Pages

About Me + Copyright + Disclaimer + Privacy Policy

My Favorite Creations

Categories

Favorites

Saturday, April 30, 2016

Happy Birthday Panda Card (Kitty Bee Designs Spotlight)

http://kittybeedesigns.blogspot.com/

Hi everyone! :o)

Today is my turn to be on the spotlight over at Kitty Bee Designs and I made this CAS (clean and simple), masculine, Happy Birthday Panda Card.


I used super cute 'Panda Love' from 2013 January Panda Releases. Love all of them! :o)

I printed the panda on a white cardstock paper, stamped circles around his eyes, colored them with black marker and fussy cut the panda. I covered panda's muzzle with gloss resin gel to create glossy accents.

After panda's muzzle was dry, I stamped a sentiment on a white card base, glued 3-D foams on the back of the panda and placed him on a card.

I colored wood chip arrow with black permanent marker and glued it on the card. I stamped little stars and glued enamel dots and arrows on the card and it was finished. :o)

Dimensions: 101 mm x 133 mm (4" x 5 1/4")

List of supplies:

I hope you enjoyed my today's spotlight card. Check out more cute images at the 
Kitty Bee Designs Etsy StoreKitty Bee Designs Blog and Kitty Bee Designs FB. :o)


I am entering my card to following challenges:
Note: bold text and challenge badge (if any) are direct links to the current challenge and blog badge is a direct link to blog or challenge home page.


1) Addicted to stamps and More, Challenge #191 - Anything Goes
This is my 2nd entry to this challenge.

2) Create a Smile April projects
This is my 2nd entry to this challenge.

3) Simon Says Stamp Wednesday Challenge Blog, Challenge: Anything Goes
This is my 2nd entry to this challenge.


Thank you for stopping by and your kind feedback. Enjoy and smile! :o)


Crafty Milka 

Wednesday, April 27, 2016

Masculine Speech Bubbles Birthday Card Set (Jane's Doodles DT Spotlight)


Hi everyone :o)

Today was my turn to be on the spotlight over at Jane's Doodles and I made a set of three CAS (clean and simple), one layer, masculine cards, Masculine Speech Bubbles Birthday Card Set. :o)


I rarely make masculine cards, so I decided to make couple of them. I was inspired with my I Love Math Challengecomic books and Ombré Effect. :o)

For these cards I used two Jane's Doodles stamp sets'Read All About It' and 'Anemone'.


How I made my cards...


I stamped speech bubble on a card base and heat embossed sentiment on a wood chip speech bubble. I love pop-up elements on cards. I glued 3-D foams on the back of the speech bubble, glued it on the card base and decorated the card with enamel dots.


stamped speech bubbles on a card base. Then I stamped the speech bubble on a black cardstock paper, cut the shape out and heat embossed sentiment on it. I glued 3-D foams on the back of the speech bubble, glued it on the card base and decorated the card with enamel dots.


stamped the speech bubble on a card base. colored a wood chip speech bubble with a black permanent pen and glued it on the card. Then I stamped one more speech bubble on the black cardstock paper, cut the shape out, heat embossed sentiment on it, glued 3-D foams on the back, placed the bubble on the card and decorated the card with enamel dots.


Cards measure: 94 mm x 133 mm (3 3/4" x 5 1/4")


List of supplies:


I am entering my card set to following challenges:
Note: bold text and challenge badge (if any) are direct links to the current challenge and blog badge is a direct link to blog or challenge home page.


1) Addicted to stamps and More, Challenge #191 - Anything Goes

2) Dragons Lair Designs Challenge, April Challenge: Anything Goes

3) Simon Says Stamp Wednesday Challenge Blog, Challenge: Anything Goes


Reminder:
There's still more time to join my first I Love Math Challenge. :o)


Thank you for stopping by and your kind feedback. Enjoy and smile! :o)


Crafty Milka

Tuesday, April 26, 2016

After Rain, Quotation Card no. #1 (Fairy Tale Challenge #142)


Hi everyone! :o)


Today a new challenge started at Fairy Tale Challenge Blog.

The theme for this fortnight is #142, Foto Bingo / Photo Bingo.


This time our lucky winner will win this adorable mini stamp set.


For this challenge I made this After Rain, Quotation Card. It's a decoration with a magnetic sheet on back.  I like this so much, I'll definitely make more of them. :o)


First idea was to make a greeting card. More I worked on it, less I wanted it to be the greeting card. :o)

I cut a white watercolor paper panel and typed quotation on a typewriter.

Images are layered. I stamped boots from Jane's Doodles 'Rain or Shine' stamp set and a bird from Paper Smooches 'Forest Whimsy' stamp set directly on the panel and once more on a piece of watercolor paper. Then I colored images in watercolor technique using Distress Inks.

While images were drying, I colored a background in watercolor technique using Distress Ink. I added several layers of color and dried them between. When I was satisfied with the color, I splattered whole panel (with water, distress ink and white acrylic paint). 

Then I drew double line frame with fine black pen (0.4 mm), fussy cut colored images, colored edges with a black marker and glued them over stamped images on the panel. I added white highlights and the panel was finished.

At this point, my honey and I together decided we want to keep this for ourselves. :o)

I cut a rectangle cardstock base. This a recycled item. I cut it out from s watercolor paper pad package. I rarely throw away cardstock and try to reuse it for new projects or as a crafting mat. :o)

I colored the cardstock base with white acrylic paint and after it was dry I glued the panel on it. At the end I glued whole card on a magnetic sheet, cut it out and my quotation card /magnet was finished.


Dimensions:  88 mm x 126 mm (3 1/2" x 5")

List of supplies:
  • Jane's Doodles 'Rain or Shine' Stamp Set
  • Paper Smooches 'Forest Whimsy' Stamp Set
  • white watercolor paper
  • cardstock (recycled item: I used a back side of watercolor paper pad)
  • magnetic sheet
  • Ranger Archival Ink (Jet Black)
  • Tim Holtz's Distress Inks:
    • Mustard Seed
    • Twisted Citron
    • Blueprint Sketch
  • Stabilo Pen (Marker) Black 68/46
  • Stabilo Pen Black 88/46, fine 0.4 mm
  • Marabu Acrylic Paint (070 White)
  • Uniball Signo White
  • UHU universal glue
  • Art Potch découpage glue and varnish
  • UNIS tbm de Luxe Typewriter
  • MS scoring board
  • Sigma Rotary Paper Trimmer
  • scissors
  • acrylic block (102 mm x 102 mm)
  • Marabu rounded fine brush no. 0
  • Marabu flat fine paint brush no. #6
  • Marabu flat fine paint brush no. #10
  • Ranger Heat It Craft Tool
  • water
  • paper towels

I hope you liked my project for this fortnight and got inspired. Stop by the Fairy Tale Challenge Blog and see gorgeous creations my Design Team Mates and our Guest Designers made for this challenge. Do join us, we can't wait to see your projects. :o)


I am entering my project to: 
Noor! Design U.K., April Challenge #17 - Anything Goes


Thank you for stopping by and your kind feedback. Enjoy and smile! :o)


Crafty Milka

Saturday, April 23, 2016

Excavator Birthday Card


Hi everyone! :o)

Today I want to share with you an Excavator Birthday Card I made for my landlord's son, who celebrated 2nd birthday this month. He loves excavators and tools and always carries them arround. Such a fun kid! :o)


My card is a CASE of an amazing card (link to Create a Smile blog) made by Christine Drogt of Kartenchaos. :o)


Christine is very kind and friendly person and amazing designer, illustrator and many more. Her CAS cards designs are stunning! I love her style! :o)


Christine is an owner and illustrator of Create a Smile. Stamps, stencils, papers, enamel stickers, wood chips... Love love love!!! :o) Here is a link to  Create a Smile blog and shop .

Christine also set up an art project #Smilespotting. Cards to brighten someones day, fun ideas and beautiful designs, gorgeous hand lettering... If you would like to find out more about this fun project, just follow this link. :o)


And now, how I made my card and couple tips. :o)

For this card I used Create a Smile 'Whimsical Wheels' Stamp Set, which is sold out and retired. I'm so happy I managed to get this cute stamp set before it retired. :o)

I went with same layout, stamp set, color scheme, embellishments as Christine on her card, I just skipped stamping background. Must say Christine's idea is awesome and will try it definitely in future. :o)

First I made an excavator. I stamped the image on a patterned paper from Create a Smile 'Sending Sunshine' paper pack. Then I colored whole surface with Yellow Stabilo Marker, adding more color on the edges to accent shades. I colored wheels, double bucket and pivot points with black marker.
TIP: When coloring, shading etc. patterned papers, leave them dry a bit to prevent ink smearing.

Next up was fussy cutting. I love it! One of my favorite techniques! I fussy cut the excavator and cut out a window.
TIP: When fussy cutting, first cut away large pieces of paper and then cut on the lines. Rotate paper, it will be much easier to cut around tiny details. 

Then I colored edges with black marker.
TIP: Color edges of fussy cut image with black pen or marker. This way you'll hide white edges and any white space you didn't cut off. Your paper pieced image will look much better.

As I decided to keep this card as simple as possible with a lot of white space, I played a bit more with the image. I glued a piece of an acetate on the window and covered tires, double bucket and pivot points with gloss resin to create glossy accents.
TIP: Use scraps of acetate sheets to create windows on objects. It looks very interesting. :o)
TIP: You can create glossy accents on your cards not only with Ranger's product Glossy Accents. I use gloss resin super-clear. I pour medium on a piece of paper and add it on the parts I want with crafting needle. You can also use toothpicks, sewing needle etc.


I heat embossed a sentiment on a piece of black cardstock paper scrap and cut out a banner shape.
TIP: Don't throw away any paper. Even the smallest pieces can be used for something. 

After all parts were dry, I put everything together. I glued 3-D foams on the back of the excavator and banner and glued them on a white cardstock card base. I used 2 different thick 3-D foams.
TIP: Use different thick 3-D foams on your CAS cards. Pop-up elements will look even more interesting.

At the end I embellished card with enamel stickers. :o)


Card dimensions: 102 mm x 133 mm (4" x 5 1/4")

List of supplies: 


  • Create a Smile 'Whimsical Wheels' Stamp Set
  • The Alley Way Stamps (TAWS) 'From Us' Stamp Set (shop is closed)
  • Create a Smile 'Sending Sunshine' Paper Pack
  • white cardstock paper
  • black cardstock paper
  • Ranger's Archival Ink (Jet Black)
  • Tsukineko VersaMark Watermark Stamp Pad
  • WOW! Embossing Powder (Opaque Bright White, Regular, WL01R)
  • Faber-Castell black permanent marker F
  • Stabilo Pens (Markers) 68:
    • Yellow 44
    • Black 46
  • Create a Smile 'Sending Sunshine' Enamel Stickers
  • acetate sheet scrap
  • strong double sided adhesive tape
  • 3-D foams
  • Gloss Resin Gel Super Clear
  • MS scoring board
  • Sigma Rotary Paper Trimmer
  • Fiskars High Precision Personal Paper Trimmer
  • scissors 
  • acrylic block (102 mm x 102 mm)
  • Ranger Heat It Craft Tool
  • crafting needle
  • powder bag


I am entering my card to following challenges:
Note: bold text and challenge badge (if any) are direct links to the current challenge and blog badge is direct link to blog or challenge home page.

1) Create a Smile April projects

This is my 1st entry to this challenge.

2) Crafting By Designs, April Anything Goes

This is my 3rd entry to this challenge.

3) Little Miss Muffet Challenges, Challenge #136 - Anything Goes

4) Paru's Card Making Challenges, April Challenge: Anything Goes
This is my 2nd entry to this challenge.


Thank you for stopping by and your kind feedback. Enjoy and smile! :o)


Crafty Milka

Friday, April 22, 2016

Rain or Shine Card (KBD Aloha Friday Challenge #70)

http://kittybeedesigns.blogspot.com/

Hi everyone! :o)

My second post today... If you missed the first one, just scroll down or follow a direct link here.


Today a new Aloha Friday Challenge starts at Kitty Bee Designs.

The challenge for this fortnight is #70 - April Showers bring May Flowers (rain, clouds, umbrellas, puddles, raincoats, etc.).

We have two sponsors for this challenge: Star Stampz and Julia Spiri, so there will be double prizes! :o)


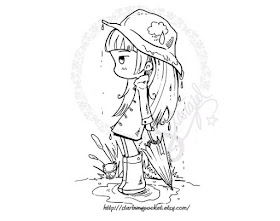
For this challenge I made this Rain or Shine Card, using our sponsor's Star Stampz lovely 'Spring Rain' digital stamp.


Image is paper pieced.

I printed two images, one on a white 160 grams paper and second on a white watercolor paper. First I thought I will color images in watercolor technique, but I changed my mind. I also wanted to see the effect of colored pencils and blending with baby oil on watercolor paper I use.

I colored girl printed on the watercolor paper with colored pencils. Then I blended colors using paper stumps and baby oil. I haven't done this for ages. :o)

If you want to know more about blending colored pencils, check out this great video by Dina Kowal: Colored Pencils Blending Methods.

While the image was drying, I masked bottom part of the image printed on the white paper and blended background with Distress Inks. When I was satisfied with the color, I splattered the panel with water. I removed mask and colored part of the image with colored pencils. I also blended colors with baby oil.

I left drying both images couple of hours, until the oil wasn't dry.

After drying, I fussy cut girl, colored the edges with black marker and glued her over other image. I cut off excess parts of the panel and glued it on a white cardstock card base.


Last was a sentiment. I used sentiment from Jane's Doodles 'Rain or Shine' Stamp Set. First I stamped the sentiment directly on the card with black archival ink and didn't like it at all. I heat embossed same sentiment in white on a scrap of black cardstock paper, cut out a shape I like (inspired by work of Christine Drogt), glued 3-D foams on the back of sentiment banner and glued it on the card.

At the end I embellished my card with some enamel stickers and my card was finished. :o)


Card dimensions: 92 mm x 125 m(3 5/8" x 4 15/16")

List of supplies:
  • Star Stampz 'Spring Rain' Digital Stamp
  • Jane's Doodles 'Rain or Shine' Stamp Set (sentiment)
  • white cardstock paper (card base)
  • white paper 160 grams (panel)
  • white watercolor paper
  • black cardstock paper stripe
  • Tsukineko VersaMark Watermark Stamp Pad
  • WOW! Embossing Powder (Opaque Bright White, Regular, WL01R)
  • Tim Holtz's Distress Inks:
    • Tumbled Glass
    • Broken China
    • Faded Jeans
    • Stormy Sky
    • Lucky Clover
  • TOZ colored pencils: skin color and pink
  • Koh-i-noor Woodless Colored Pencils
    • Chrome Yellow 1
    • Reddish Orange 2
    • Cobalt Blue 6
    • Sapphire Blue 7
    • Meadow Green 4
    • Dark Green 5
    • Natural Sienna 11
  • Stabilo Pen (Marker) 68/46 Black
  • Create a Smile 'Snow Dance' enamel stickers 
  • Create a Smile 'Sending Sunshine' enamel stickers
  • Create a Smile 'Pretty Cool' enamel stickers 
  • UHU universal glue
  • 3-D foams
  • printer
  • acrylic block (102 mm x 102 mm)
  • MS scoring board
  • Sigma Rotary Paper Trimmer
  • Fiskars High Precision Personal Paper Trimmer
  • Ranger Heat It Craft Tool
  • Tim Holtz's bledning tool
  • scissors
  • tweezers
  • Marabu fine rounded paint brush no. #0
  • crafting needle
  • paper stumps various sizes
  • baby oil
  • powder bag
  • water
  • paper towels

Stop by the Kitty Bee Designs blog and check out lovely projects my Design Team mates created. Do join us in this challenge, we are looking forward to see your projects. :o)


I am entering my card to following challenges:
Note: bold text and challenge badge (if any) are direct links to the current challenge and blog badge (if any) is a direct link to blog or challenge home page.

1) Crafting By Designs, April Anything Goes
This is my 2nd entry to this challenge.

2) Crafty Calendar Challenge, April Anything Goes Challenge
This is my 2nd entry to this challenge.

3) Paru's Card Making Challenges, April Challenge: Anything Goes


Thank you for visiting and your kind feedback. Enjoy and smile! :o)


Crafty Milka