
Hi everyone! :o)
I hope you're all well and enjoying the weekend. :o)
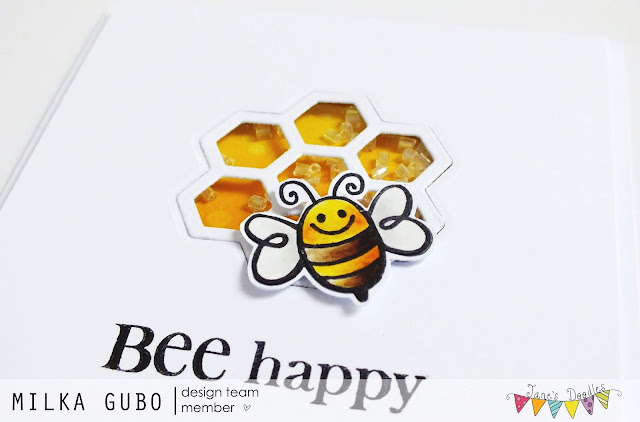
This Monday, May 25th, was my turn to be on the spotlight over at Jane's Doodles Blog and I made this Bee Happy CAS Shaker Card. :o)

To make this card I used stamps from two Jane's Doodles stamp sets: a bee from 'Spring Icons' and a sentiment from discontinued stamp set 'Boris the Bunny'.
I hope you're all well and enjoying the weekend. :o)
This Monday, May 25th, was my turn to be on the spotlight over at Jane's Doodles Blog and I made this Bee Happy CAS Shaker Card. :o)

How I made my card....
First I worked on a shaker window.
I die-cut a honeycomb in two white cardstock paper panel, glued an acetate sheet over the window between two panels. I stamped the sentiment on the panel and glued the honexcomb die cut over the acetate window.
I blended Distress Inks on a white cardstock paper scrap, splattered the surface with water, dried it and repeated the process. When I was satisfied with the color, I glued the ink blended scrap on a white top folded card base.
Then I glued 2 mm thick foam squares on the panel, filled window with transparent beads and glued the panel on the card base. I glued another white panel inside the card base to make my card sturdier.
Next up was the adorable bee. I paper pieced the image.
I stamped the bee twice on a watercolor paper and colored it in watercolor technique using Distress Inks. On one image I colored only wings and other bee's body. After drying, I fussy cut parts I needed and traced edges with black marker.
I stamped another bee on a white cardstock paper and fussy cut it, leaving thin white border around it. I colored the bee with a grey marker. I glued watercolored parts over the grey bee, first wings then body.
Lastly, I glued 1 mm thick foam squares at the back of the bee, glued it on the card and my card was finished. :o)
I really like how my card turned out. :o)
Lastly, I glued 1 mm thick foam squares at the back of the bee, glued it on the card and my card was finished. :o)
I really like how my card turned out. :o)

Card measurements: 3 3/4" x 5" (95 mm x 127 mm)
List of supplies:
List of supplies:
- Jane's Doodles 'Spring Icons' stamp set
- Jane's Doodles 'Boris the Bunny' stamp set (discontinued)
- Your Next Stamp 'Honey Drip and Honeycomb Combo' die set
- white cardstock paper
- watercolor paper
- Ranger Archival Ink (Jet Black)
- Tim's Holtz Distress Inks:
- Mustard Seed
- Fossilized Amber
- Ground Espresso
- Hickory Smoke
- Stabilo Fiber Tip Pen (Marker) 68/46, Black
- Stabilo Fiber Tip Pen (Marker) 68/94, Light Grey
- transparent beads
- UHU liquid glue
- Saqura Quickie Glue Pen
- 3-D foam squares, 5 x 5 x 2 mm
- 3-D foam squares, 5 x 5 x 1 mm
- acrylic sheet
- acrylic block (102 mm x 102 mm)
- Fiskars High Precision Personal Paper Trimmer
- bone folder
- Sizzix Big Shot
- Marabu rounded fine paint brush no. 3/0
- Ranger Heat It Tool (for drying)
- Ranger Mini Ink Blending Tools
- scissors
- paper towels
- water

And here is a short video. :o)
Thank you for stopping by and your kind feedback. Enjoy and smile! :o)
Milka

