Showing posts with label Ninja. Show all posts

Thursday, May 2, 2019

Ninja Pull-Tab Slider Card (IC #8)

Hi everyone! :o)

Today I want to share with you this CAS (clean and simple), Ninja Pull-Tab Slider Card. :o)


This is a PULL-TAB SLIDER CARD. I made this Interactive Card (IC) for my Celebrating 30 Days of Pisces 2019 personal challenge. If you want to find out more about it, just follow the link provided. :o)

This is an eighth type of IC I made for my challenge. I made 15 different types of interactive cards during Pisces period, which was my personal challenge. I completed my challenge, achieved my goals and had a lot of fun. I wrote a short review about the challenge here.
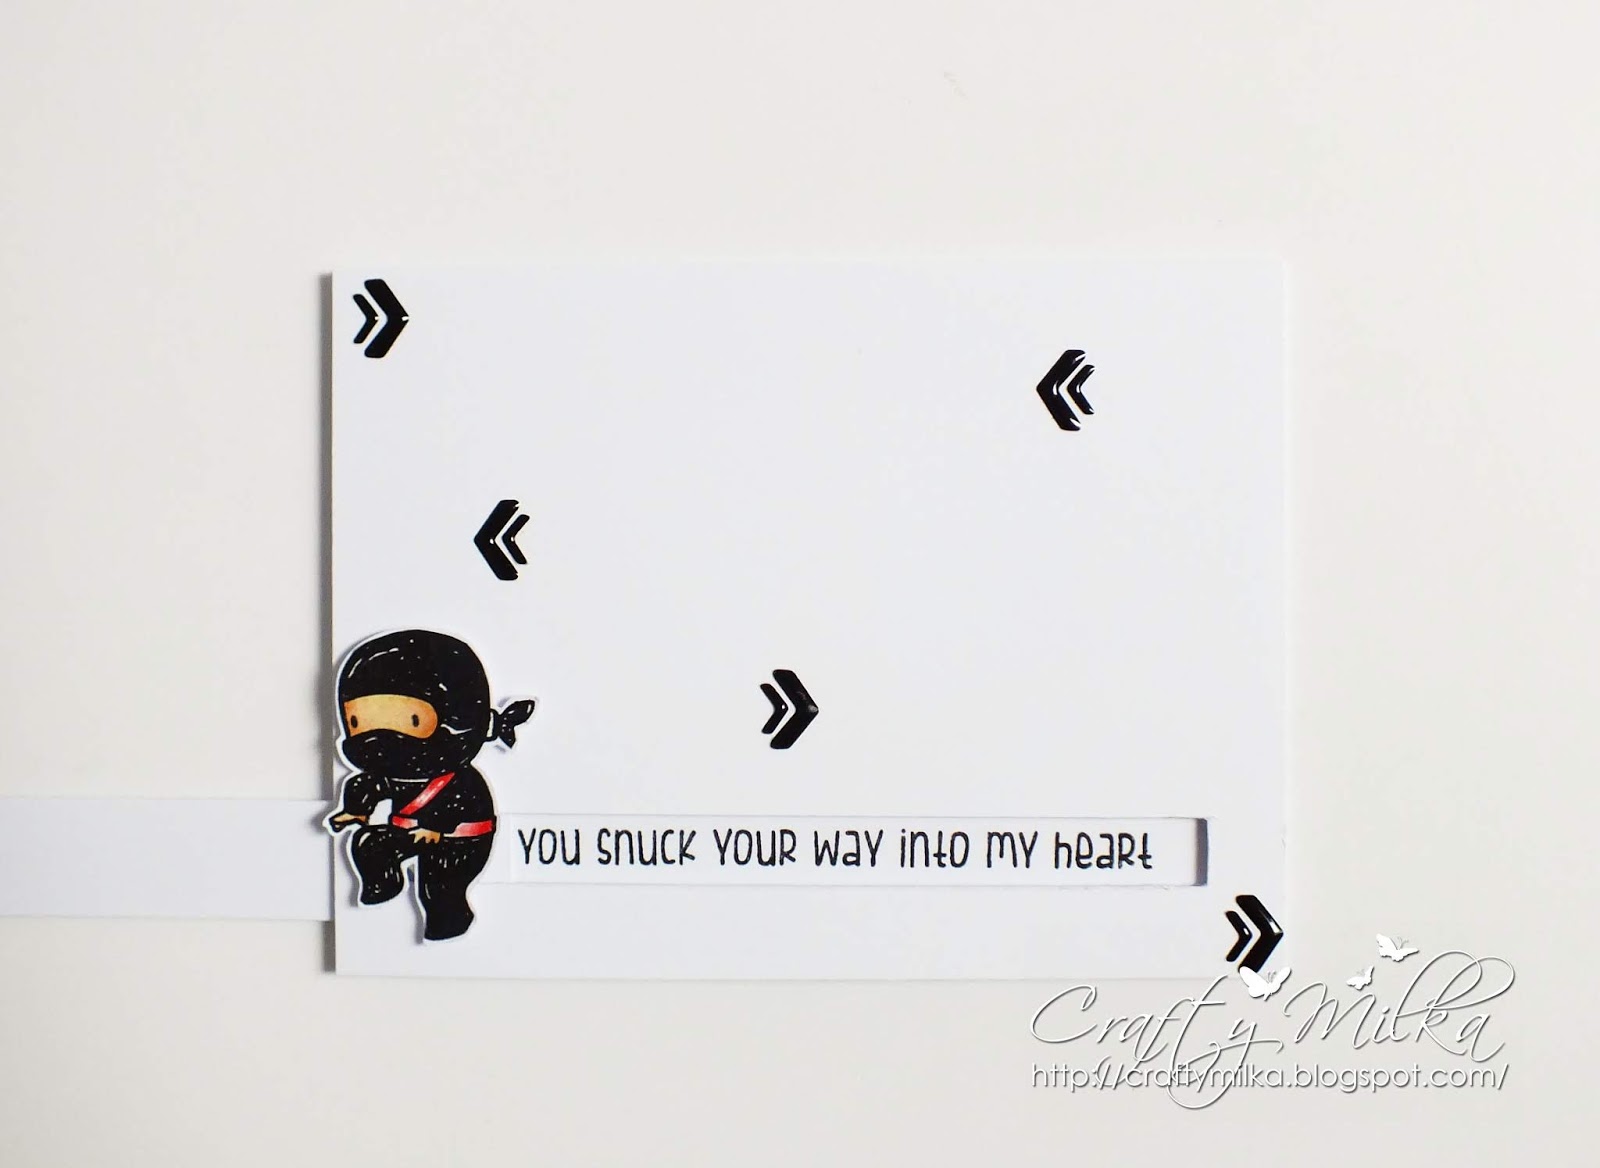


How I made this card...

To make this card I used a super cute Mama Elephant 'Tiny Ninjas' stamp set. LOVE!!! :o)

I colored a Ninja during Kathy's Racoosin 12th 30 Day Coloring Challenge. You can see all my coloring samples during the challenge here.

I stamped the adorable ninja on a watercolor paper and watercolored him using Distress Inks. After drying, I fussy cut the ninja and traced edges with black marker.

I stamped one more ninja on a white cardstock paper, colored ninja with black marker and fussy cut him, this time leaving white thin border around him.

I glued both images together, the watercolored ninja over the black one. I did this because the watercolor paper I use is very thin and I needed thicker image for my card.

I drew white highlights on ninja's belt and the image was finished.

I prepared a side folded card base and a white cardstock paper panel, both same size.

I cut two long parallel lines on the panel using ruler and kraft knife. Then I cut two smaller parallel lines and removed a cut out rectangle shape from the panel.

Then I made a pull-tab. I cut a stripe from the white cardstock paper, rounded edges with scissors and glued a plastic button on the end of the tab.

I cut one more stripe from the white cardstock paper and stamped a sentiment on it.

With all parts ready, I assembled the card. I glued the sentiment stripe on the card base, glued 3-D foams on the panel, placed the sentiment stripe on the card base and carefully glued the panel on the card base, making sure the button was peeking through the cut out on the panel. Prior I continued, I tested the pull-tab. Then I glued the ninja on the button and left it dry for an hour.

As a finishing touch, I embellished the card with black enamel stickers. :o)


Card measurements: 95 mm x 127 mm (3 3/4" x 5")

List of supplies:
  • Mama Elephant 'Tiny Ninjas' stamp set
  • white cardstock paper
  • watercolor paper
  • Ranger's Archival Ink (Jet Black)
  • Tim Holtz's Distress Inks:
    • Tea Dye
    • Barn Door
  • Stabilo Fiber Tip Pen (Marker) 68/46, Black
  • white plastic button
  • Create a Smile 'Neat & Neutral' enamel sticker
  • UHU liquid glue
  • 3-D foam 5 x 5 x 2 mm
  • acrylic block (102 mm x 102 mm)
  • Fiskars High Precision Personal Paper Trimmer
  • Xcut Self Healing Cutting Mat A4
  • bone folder
  • scissors
  • kraft knife
  • crafting needle
  • ruler
  • Marabu rounded fine paint brush no. #0
  • water
  • paper towels

I love how my card turned out, as this was my first take on this interactive card type. My sweetheart loves it too. I made the card for him. :o)

Here is a short video... I'm filming with one hand and moving pull-tab with other. LOL That was fun. :o)

(incompetech.com)
Licensed under Creative Commons: By Attribution 3.0

http://creativecommons.org/licenses/by/3.0/


Thank you for stopping by and your kind feedback. Enjoy and smile! :o)


Milka

Saturday, April 27, 2019

Ninja Spinner Card (IC #7)

Hi everyone! :o)

Today I want to share with you this CAS (clean and simple), Ninja Spinner Card. :o)


I made this Interactive (IC) SPINNER CARD for my Celebrating 30 Days of Pisces 2019 personal challenge. If you want to find out more about it, just follow the link provided. :o)

This is a seventh type of IC I made for my challenge. I made 15 different types of interactive cards during Pisces period, which was my personal challenge. I completed my challenge, achieved my goals and had a lot of fun. I wrote a short review about the challenge here.

This is my second try on a spinner card. I went with same design as on a first spinner card I made (here). This time I used better thread. :o)


How I made this card...

To make this card I used a super cute Mama Elephant 'Tiny Ninjas' stamp set. LOVE!!! :o)

I stamped adorable ninjas on a watercolor paper and watercolored them using Distress Inks. After drying, I fussy cut ninjas and traced edges with black marker. These two images are reflected images from the set. I love that, as a reflection/mirror stamping technique isn't something that ever worked for me. :o)

'Reflection. Flip. A transformation in which a geometric figure is reflected across a line, creating a mirror image. That line is called the axis of reflection.'

I stamped one more ninja (one with closed eyes) on a white cardstock paper, colored ninja with black marker and fussy cut him, this time leaving white thin border around him.

Then I glued all images together. I glued one ninja over the black one, glued white cotton thread on the back of ninja and glued the other watercolored ninja over the thread.

I die-cut a circle on a front panel of a white top folded card base and in a white cardstock paper panel. Then I stamped a sentiment on the panel and tiny ninja stars (Shuriken). I loosely watercolored ninja stars with a Distress Ink Hickory Smoke.

With all parts ready, I assembled the card. I glued the image on the thread on the card base, glued the panel on the card base and my card was finished. :o)


Card measurements: 95 mm x 127 mm (3 3/4" x 5")

List of supplies:


I love how my card turned out. Here is a short video. :o)

(incompetech.com)
Licensed under Creative Commons: By Attribution 3.0

http://creativecommons.org/licenses/by/3.0/


Thank you for stopping by and your kind feedback. Enjoy and smile! :o)


Milka

Friday, April 26, 2019

Ninja Swinging Card (IC #6)

Happy Friday!! :o)

Today I want to share with you this CAS (clean and simple), Ninja Swinging Card. :o)


This is a SWINGING CARD. I made this Interactive Card (IC) for my Celebrating 30 Days of Pisces 2019 personal challenge. If you want to find out more about it, just follow the link provided. :o)

This is a sixth type of IC I made for my challenge. I made 15 different types of interactive cards during Pisces period, which was my personal challenge. I completed my challenge, achieved my goals and had a lot of fun. I wrote a short review about the challenge here.


How I made this card...

To make this card I used a super cute Mama Elephant 'Tiny Ninjas' stamp set. LOVE!!! :o)

I colored a Ninja during Kathy's Racoosin 12th 30 Day Coloring Challenge. You can see all my coloring samples during the challenge here.

I stamped the adorable ninja on a watercolor paper and watercolored him using Distress Inks. After drying, I fussy cut the ninja and traced edges with black marker.

I stamped one more ninja on a white cardstock paper, colored ninja with black marker and fussy cut him, this time leaving white thin border around him.

I glued both images together, the watercolored ninja over the black one. I did this because the watercolor paper I use is very thin and I needed thicker image for my card.

Then I prepared a top folded card base and a white cardstock paper panel, both same size.

I cut two concentric semicircles on the panel using EK Success Circle Cutter. Then I cut lines using a kraft knife and a ruler.


I stamped a sentiment on the panel and glued a black thread on the back of the panel with self adhesive tape.

For a slider mechanism, I used die-cut circles in the white cardstock and plastic letter bead. I glued two die-cut circles together. Then I glued the bead on glued circles. I didn't use any special glue. I used UHU all purpose liquid glue.

With all parts ready, I assembled the card. I glued 3-D foams on the back of the panel, placed the slider mechanism on the card base and glued the panel on the card base. I glued ninja on the thread first and then on the slider mechanism.

Lastly, I trimmed excess of the thread and my card was finished. :o)


    Card measurements: 92 mm x 127 mm (3 5/8" x 5")

    List of supplies:
    • Mama Elephant 'Tiny Ninjas' stamp set
    • white cardstock paper
    • watercolor paper
    • Ranger's Archival Ink (Jet Black)
    • Tim Holtz's Distress Inks:
      • Tea Dye
      • Hickory Smoke
    • Stabilo Fiber Tip Pen (Marker) 68/46, Black
    • 100% cotton crochet embroidery thread (TULIPAN no. 15, black)
    • plastic letter bead
    • UHU liquid glue
    • self adhesive tape
    • 3-D foam squares, 5 x 5 x 2 mm
    • acrylic block (102 mm x 102 mm)
    • Fiskars High Precision Personal Paper Trimmer
    • EK Success Circle Cutter
    • Xcut Self Healing Cutting Mat A4
    • Sizzix Big Shot
    • circle die-cuts from Sizzix Big Shot starter kit
    • bone folder
    • scissors
    • kraft knife
    • ruler
    • Marabu rounded fine paint brush no. #0
    • water
    • paper towels


    I love how my card turned out. Here is a short video. :o)

    (incompetech.com)
    Licensed under Creative Commons: By Attribution 3.0


    Thank you for stopping by and your kind feedback. Enjoy and smile! :o)


    Milka

    Thursday, April 25, 2019

    Ninja Circle Slider Spinner Card (IC #5)

    Hi everyone! :o)

    Today I want to share with you this CAS (clean and simple), Ninja Circle Slider Spinner Card. :o)


    This is a CIRCLE SLIDER SPINNER CARD. I made this Interactive Card (IC) for my Celebrating 30 Days of Pisces 2019 personal challenge. If you want to find out more about it, just follow the link provided. :o)

    This is a fifth type of IC I made for my challenge. I did create circle slider spinner card for this challenge, but it was double (here), so I considered it as different interactive card type. :o)

    I made 15 different types of interactive cards during Pisces period, which was my personal challenge. I completed my challenge, achieved my goals and had a lot of fun. I wrote a short review about the challenge here.


    How I made this card...

    To make this card I used a super cute Mama Elephant 'Tiny Ninjas' stamp set. LOVE!!! :o)

    I colored a Ninja during Kathy's Racoosin 12th 30 Day Coloring Challenge. You can see all my coloring samples during the challenge here.

    I stamped the adorable ninja on a watercolor paper and watercolored him using Distress Inks. After drying, I fussy cut the ninja and traced edges with black marker.

    I stamped one more ninja on a white cardstock paper, colored ninja with black marker and fussy cut him, this time leaving white thin border around him.

    I glued both images together, the watercolored ninja over the black one. I did this because the watercolor paper I use is very thin and I needed thicker image for my card.

    Then I prepared a top folded card base and a white cardstock paper panel, both same size.

    I cut two concentric circles on the panel using EK Success Circle Cutter, removed the circle belt and stamped a sentiment in a small circle.

    I stamped tiny ninja stars (Shuriken) on the panel and on the small circle and loosely watercolored them with a Distress Ink Hickory Smoke.

    For a slider mechanism, I used a plastic button and a plastic letter bead. I glued them together and left aside for an hour. I didn't use any special glue. I used UHU all purpose liquid glue. It works great, there is just some patience required and I have a lot of that. :o)

    With all parts ready, I assembled the card. I glued 3-D foams on the panel, glued the panel on the card base and placed the slider mechanism on the card base. I glued 3-D foams on the sentiment circle and glued it on the card base. To center it perfectly, I used that cut out circle belt left from cutting the panel as a guide. :o)

    Then I tested if the mechanism is working. I glued the ninja on the slider mechanism, left it dry for an hour and my card was finished. :o)

      I love how my card turned out. Here is a short video. :o)

      (incompetech.com)
      Licensed under Creative Commons: By Attribution 3.0

      http://creativecommons.org/licenses/by/3.0/

      Card measurements: 95 mm x 127 mm (3 3/4" x 5")

      List of supplies:
      • Mama Elephant 'Tiny Ninjas' stamp set
      • white cardstock paper
      • watercolor paper
      • Ranger's Archival Ink (Jet Black)
      • Tim Holtz's Distress Inks:
        • Tea Dye
        • Hickory Smoke
      • Stabilo Fiber Tip Pen (Marker) 68/46, Black
      • plastic button
      • plastic letter bead
      • UHU liquid glue
      • 3-D foam squares, 5 x 5 x 3 mm
      • acrylic block (102 mm x 102 mm)
      • Fiskars High Precision Personal Paper Trimmer
      • EK Success Circle Cutter
      • Xcut Self Healing Cutting Mat A4
      • bone folder
      • scissors
      • Marabu rounded fine paint brush no. #0
      • water
      • paper towels


      Thank you for stopping by and your kind feedback. Enjoy and smile! :o)


      Milka

      Saturday, March 9, 2019

      Karate Red Belt Spinner Card

      Hello everyone! :o)

      Today I want to share with you this CAS (clean and simple), Karate Red Belt Spinner Card. :o)


      I made this card last month and colored images during Kathy's Racoosin 12th 30 Day Coloring Challenge. You can see all my coloring samples during the challenge here.


      I made this card for my niece Tea (8), who trains Karate for five years. On December 7th 2018, she had her third Karate exam to earn a Red Belt. She earned it!! :o)

      Tea on the Karate Exam for Red Belt
      Photo credit: GKV

      I didn't manage to make a card for her prior testing, as I was moving that month, and then there were Christmas holidays, and then I got ill... She was super happy when I gave her the card and didn't mind at all that I gave her the card nearly 3 months after she earned the belt. :o)

      If you like, you can see cards I made for her when she earned previous Karate Belts (Yellow here, Orange here). :o)


      How I made this card...

      To make this card I used a super cute Mama Elephant 'Tiny Ninjas' stamp set. LOVE!!! :o)

      I stamped adorable ninjas on a watercolor paper and watercolored them using Distress Inks. After drying, I fussy cut ninjas and traced edges with black marker. These two images are reflected images from the set. I love that, as a reflection/mirror stamping technique isn't something that ever worked for me. :o)

      'Reflection. Flip. A transformation in which a geometric figure is reflected across a line, creating a mirror image. That line is called the axis of reflection.'

      I stamped one more ninja (one with closed eyes) on a white cardstock paper, colored ninja with black marker and fussy cut her, this time leaving white thin border around her. (As this was a card for a girl, my ninja is a girl.)

      Then I glued all images together. I glued one ninja over the black one, glued white cotton thread on the back of ninja and glued the other watercolored ninja over the thread.

      I die-cut a circle on a front panel of a white top folded card base and in a white cardstock paper panel. Then I stamped a sentiment on the panel.

      With all parts ready, my card was ready for assembling. I glued the image on the thread on the card base, glued the panel on the card base and my card was finished. :o)


      Here is a short video. :o)


      Card measurements: 95 mm x 127 mm (3 3/4" x 5")

      List of supplies:

      This is my first try on a spinner card and I'm satisfied how it turned out, but not so with a thread. It got loose after couple spins and it takes too much time to spin the image to the start position. I will surely work on that and try with a different thread next time. :o)


      I made this interactive card prior my personal challenge started, so I'm not counting it as a card I made for my challenge. I will surely make another interactive card of this type during the challenge, but next time with a different thread.  :o)

      Thank you for stopping by and your kind feedback. Enjoy and smile! :o)

      Milka

      Tuesday, September 11, 2018

      Karate Yellow Belt Shaker Card

      Hello everyone! :o)

      Today I want to share with you this CAS (clean and simple), Karate Yellow Belt Shaker Card. I love creating CAS interactive cards!!! My two favorite card designs: CAS and interactive card... 2 in 1. :o)


      I made this card for my friend's son, Fran, who trains Karate. He earned an Yellow Karate Belt. Congratulations!!! ♥

      If you would like to find out more what the Karate Belt colors mean, check out this article.


      How I made this card...

      To make this card I used a super cute Mama Elephant 'Tiny Ninjas' stamp set. LOVE!!! :o)

      I used this stamp set to make cards for my niece Tea, who also trains Karate. She earned two belts: Yellow and Orange. If you like, you can find cards I made for her here and here... or cards labeled #karate. :o) I'm sure there will be more cards using the set, as my younger niece Nika also started her Karate education. I'm so proud of those kids!!! ♥

      I stamped an adorable ninja on a watercolor paper and watercolored him using Distress Inks. After drying, I fussy cut the ninja leaving white thin border around him.

      For a layout, I used a sketch from AAA Cards, CAS Game #123 - Sketch.


      I die-cut a circle in a white cardstock paper panel, glued an acetate sheet over the window and stamped a sentiment on the panel.

      Then I blended a Distress Ink Mustard Seed directly on a white top folded card base. I splattered blended surface with a water, dried it and repeated blending the Distress Ink. When I was satisfied with a color, I glued 1 mm thick foam sheet scraps on the panel.

      I really love Jennifer's McGuire Shaker Stamped Cards and I had to give it a try on this card. Thank you for the inspiration and tips, Jennifer!! ♥

      I glued a clear thread on the ninja's back and glued thread on the foam inside the window. Then I glued another layer of 1 mm thick foam scraps on the panel. I hope this makes sense. I'm giving my best to explain the process... see Jennifer's video for all details... :o)

      I mixed various sequins and beads to get my own mix. I filled the window with shaker mix and glued the panel on the card base. To make the card sturdier, I glued a white cardstock paper panel inside the card and my card was finished. :o)


      Short video....


      Card dimensions: 95 mm x 127 mm (3 3/4" x 5")

      List of supplies:
      • Mama Elephant 'Tiny Ninjas' stamp set
      • white cardstock paper
      • white watercolor paper
      • Ranger's Archival Ink (Jet Black)
      • Tim Holtz's Distress Inks:
        • Tea Dye
        • Mustard Seed
        • Hickory Smoke
      • various sequins and beads
      • UHU liquid glue
      • foam sheet scraps, 1 mm thick
      • acrylic block (102 mm x 102 mm)
      • Fiskars High Precision Personal Paper Trimmer
      • My Favorite Things, Die-namics Wonky Stitched Circle STAX
      • Sizzix Big Shot
      • bone folder
      • scissors
      • Marabu rounded fine paint brush no. #0
      • Ranger Mini Ink Blending Tool
      • Ranger Heat It Tool (for drying)
      • water
      • paper towels
      • water
      • clear thread


      I'm linking my card to following challenges:
      Note: bold text and challenge badge (if any) are direct links to the current challenge and blog badge (if any) is a direct link to blog or challenge home page.

      1) AAA Cards, CAS Game #123 - Sketch

      2) Little Miss Muffet Challenges, Challenge #197 - Anything Goes

      3) Paru's Card Making Challenges, September 2018: Anything Goes
      This is my 2nd entry to this challenge.

      4) Simon Says Stamp Wednesday Challenges, Stamp On It
      This is my 2nd entry to this challenge.

      5) Simon Says Stamp Work it Wednesday, August/September 2018: Favorite Stamping Technique
      I like many stamping techniques. Yesterday I shared a card using one of them: masking. Today I'm sharing project made with my favorite stamping technique: stamping, coloring an image and fussy cutting. Love love love!! :o)
      This is my 2nd entry to this challenge.


      Thank you for stopping by and your kind feedback. Enjoy and smile! :o)

      Milka

      Update September 27th, 2018:
      I'm linking my card to STAMPtember fun with Mama Elephant over at Simon Says Stamp.
      Related Posts Plugin for WordPress, Blogger...