Showing posts with label Numerals. Show all posts

Friday, December 13, 2019

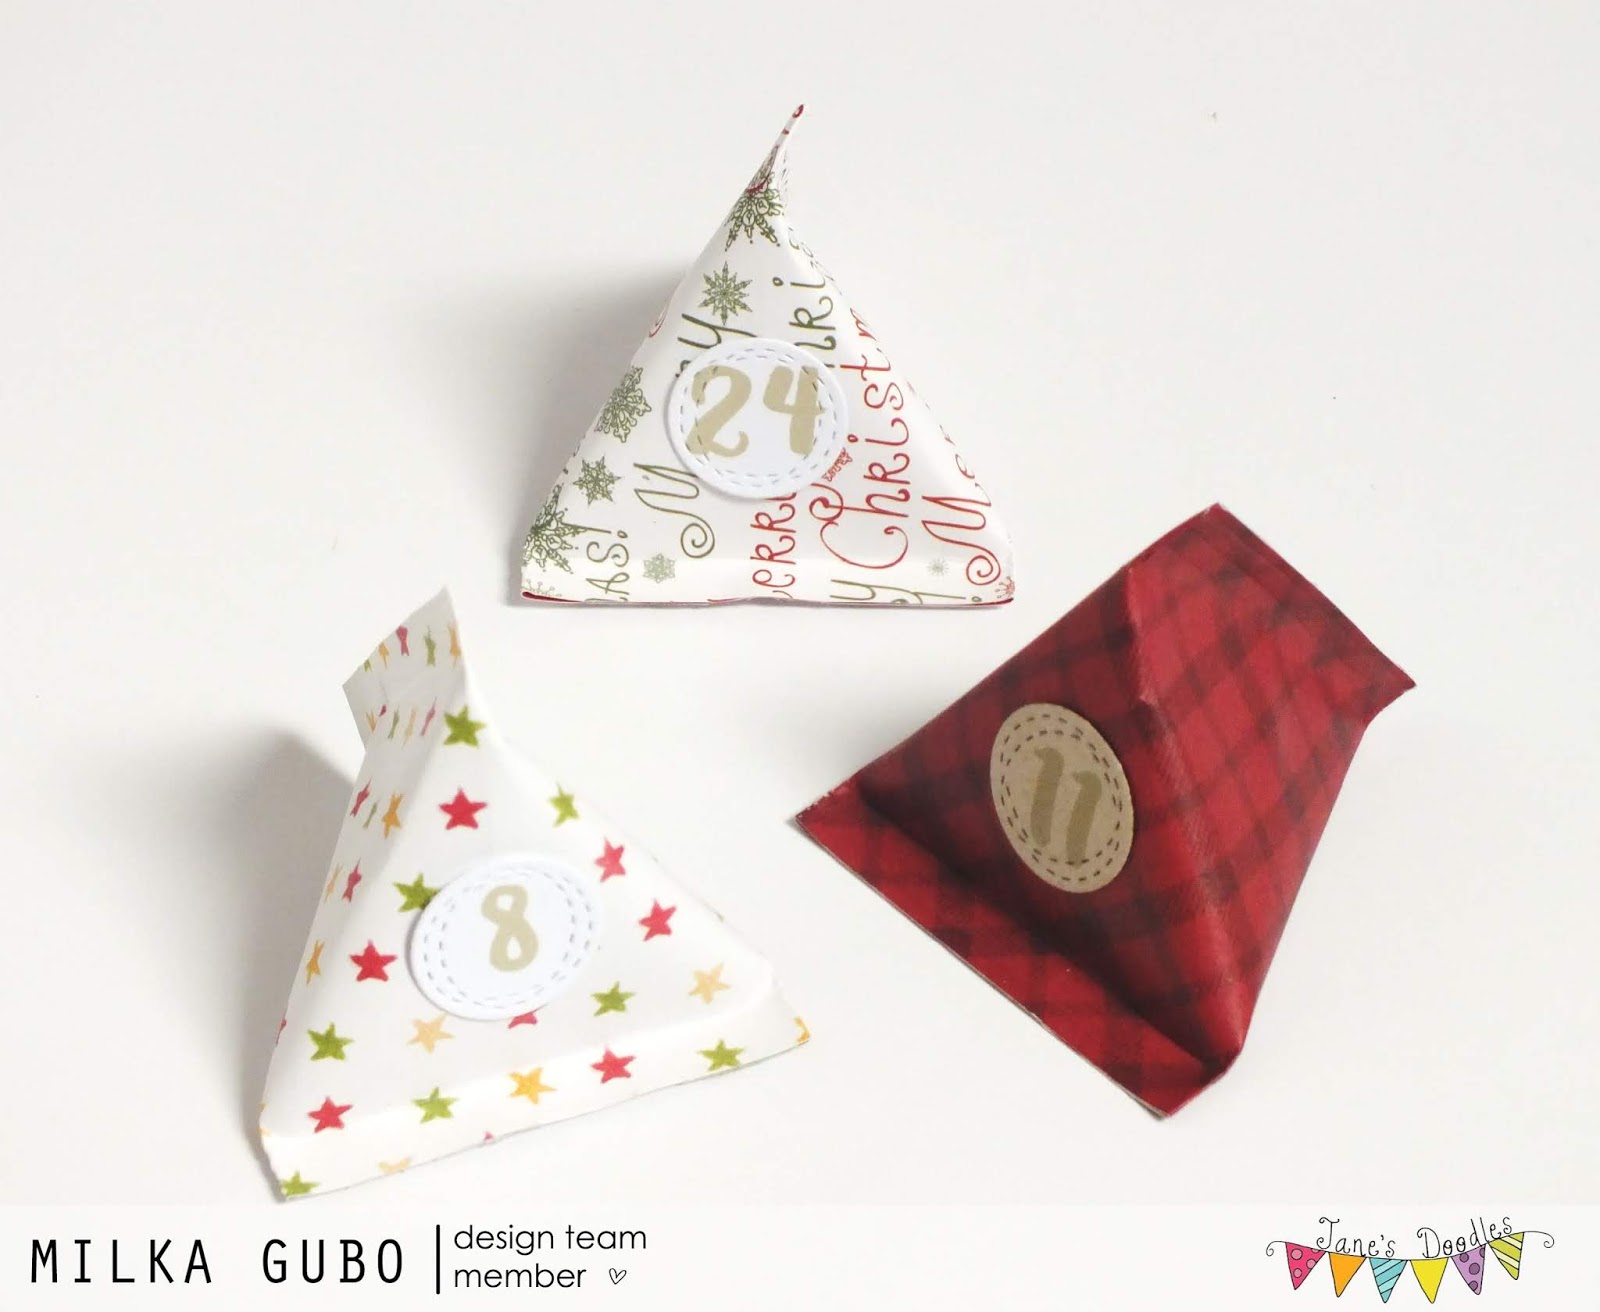
Sour Cream Containers Advent Calendar (Jane's Doodles DT Spotlight)


Happy Friday! :o)

I hope you're all well. Another busy week and I didn't find any time to write here on my blog. Today I'll be sharing two projects with you, both my DT spotlights for Jane's Doodles, one for last week and other for today. I'll be sharing my projects in two separate blog posts. :o)


On Wednesday, December 4th, 2019, was my turn to be on the spotlight over at Jane's Doodles and I made this Sour Cream Containers Advent Calendar. :o)
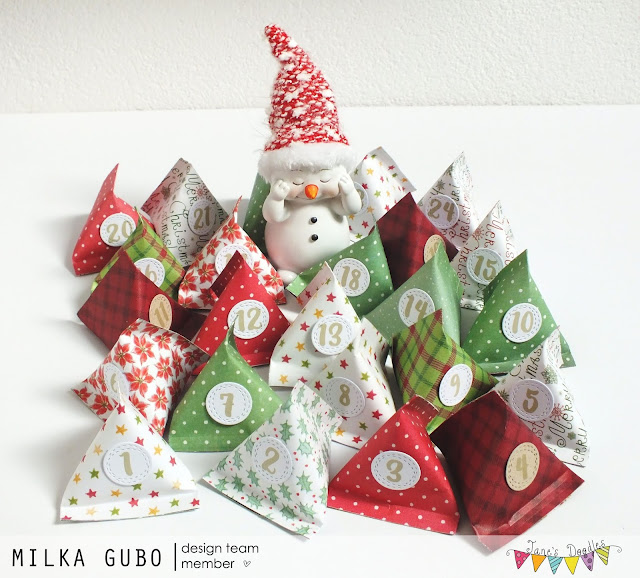

I made this Advent Calendar for my nieces. They were thrilled. :o)

To make this Advent Calendar I used patterned paper and adorable numeral stamps from Jane's Doodles 'ABC's' stamp set.


How I made this Advent Calendar... 

First I folded containers. I found great photo tutorial here.

I used 3" x 6" paper and folded 24 sour cream containers following the tutorial. I left one side of each container unglued and open to fill them later.

After folding, I filled containers, each with two same chocolate candies, glued opened part and "closed" containers.

Then I worked on numerals. I die cut circles in from white and a Kraft cardstock paper. I stamped numbers from 1 to 24 on each circle, using Kraft color ink pad. Lastly, I glued numbered circles on each container and my project was finished. :o)


List of supplies:
  • Jane's Doodles 'ABC's' stamp set
  • Crafter's Companion Bebunni Christmas 6" x 6" Designer Paper Pad
  • white cardstock paper
  • Crafter's Companion Neenah Desert Storm Kraft Coloring Card
  • UHU liquid glue
  • double sided adhesive tape
  • Sizzix Big Shot
  • My Favorite Things, Die-namics Wonky Stitched Circle STAX
  • Fiskars High Precision Personal Paper Trimmer
  • bone folder
  • acrylic block 102 mm x 102 mm
  • scissors


I'm linking my project to a challenge:

Uniko, Challenge #56 - Christmas
This is my 4th entry to this challenge.


Thank you for stopping by and your kind feedback. Stop by in two hours, I'll be sharing one more project. Enjoy and smile! :o)


Milka

Sunday, September 29, 2019

Franken Bun Card II (Kitty Bee Designs Spotlight)

http://kittybeedesigns.blogspot.com/

Hi everyone! :o)

This is my 900th blog post!!! :o)


Today is my turn to be on the spotlight over at Kitty Bee Designs and I made this CAS (clean and simple), square, Franken Bun Card II. :o)


To make this card I used an adorable "spooky" image 'Franken Bun' from Halloween 2014 Release . :o)

My card is a CASE (copy and share everything) of my own card that I made last year (here). I went with same design, layout, the image... I just changed the Franken Bun's shirt color. :o)

This is my third card I made using this cutie. You can find previous two here and here. :o)


How I made my card....

I printed the bunny on a Kraft cardstock paper and left the image aside for an hour.

I colored the bunny with colored pencils, trimmed the panel to a desirable size, stamped a sentiment on the panel and glued the panel on a slightly larger Kraft cardstock paper panel. Then I glued everything on a white square top folded card base.

As a finishing touch, I drew white highlights with a white gel pen and white pigment ink pen. :o)


Card measurements: 89 mm x 89 mm (3.5" x 3.5")

List of supplies:
  • Kitty Bee Designs 'Franken Bun' from Halloween 2014 Release
  • Jane's Doodles 'Winnie Halloween' stamp set (sentiment)
  • Crafter's Companion Neenah Desert Storm Kraft Coloring Card
  • white cardstock paper (card base
  • TOZ Artist Color colored pencils:
    • light yellow
    • dark yellow
    • orange
    • light green
    • white
  • Koh-i-noor aquarel colored pencil:
    • Dark Green 3710/26
  • Stabilo Color colored pencils:
    • dark grey
    • dark violet
  • Ranger's Archival Ink (Jet Black) 
  • Mitsuubishi Fine Liner 0.1
  • Mitsuubishi Fine Liner 0.2
  • Uniball Signo White (gel pen)
  • Uniball Signo White Pigment Ink
  • UHU liquid glue
  • printer
  • Fiskars High Precision Personal Paper Trimmer
  • bone folder
  • acrylic block (102 mm x 102 mm)
  • eraser

I hope you'll like my KBD spotlight project for this month and get inspired. Sadly, this is also my last Design Team spotlight project for Kitty Bee Designs, as the Kitty Bee Designs is permanently closing from September 30th, 2019. 

It was amazing and super fun to create with adorable KBD images and I'm very grateful that I was part of the amazing KBD Design Team since January 2015. Thank you Ruth and Kelly for believing in me and making this amazing adventure possible.

Complete preview of my KBD DT spotlight projects can be found on my Kitty Bee Designs DT Spotlight page here on my blog. :o)


I'm linking my card to following challenges:
Note: bold text and challenge badge (if any) are direct links to the current challenge and blog badge (if any) is a direct link to blog or challenge home page.

1) CAS on Friday, Challenge #164 - Animals

2) Simon Says Stamp Wednesday Challenges, Anything Goes
This is my 1st entry to this challenge.


Thank you for stopping by and your kind feedback. Enjoy and smile! :o)


Milka

Monday, October 29, 2018

Franken Bun Card (Kitty Bee Designs Spotlight)

http://kittybeedesigns.blogspot.com/

Hi everyone! :o)

Today is my turn to be on the spotlight over at Kitty Bee Designs and I made this CAS (clean and simple), Franken Bun Card. :o)


I used an adorable "spooky" image 'Franken Bun' from Halloween 2014 Release . :o)

This is my second card I made using this cutie. You can find the first one here (2015). :o)


How I made my card....

I printed the bunny on a Kraft cardstock paper and left the image aside for an hour.

I colored the bunny with colored pencils, trimmed the panel on a desirable size, stamped a sentiment on the panel and glued the panel on a Kraft top folded square card base.

As a finishing touch, I added white highlights with white gel pen. :o)


Card measurements: 89 mm x 89 mm (3.5" x 3.5")

List of supplies:
  • Kitty Bee Designs 'Franken Bun' from Halloween 2014 Release
  • Jane's Doodles 'Winnie Halloween' stamp set (sentiment)
  • Crafter's Companion Neenah Desert Storm Kraft Coloring Card
  • TOZ Artist Color colored pencils:
    • dark yellow
    • two orange tones
    • light green
    • white
  • Koh-i-noor aquarel colored pencils:
    • Dark Green 3710/26
    • Black 3710/36
  • Sedtler Noris Club colored pencils
    • dark grey
    • black
  • Ranger's Archival Ink (Jet Black) 
  • Mitsuubishi Fine Liner 0.1
  • Uniball Signo White (gel pen)
  • UHU liquid glue
  • printer
  • Fiskars High Precision Personal Paper Trimmer
  • bone folder
  • acrylic block (102 mm x 102 mm)
  • eraser

I hope you'll like my KBD spotlight project for this month and get inspired. For more inspiration and cute images jump over to the Kitty Bee Designs Etsy Store, Kitty Bee Designs Blog and Kitty Bee Designs FB. :o)


I'm linking my card to following challenges:
Note: bold text and challenge badge (if any) are direct links to the current challenge and blog badge (if any) is a direct link to blog or challenge home page.

1) CAS on Friday, Challenge #144 - Make a Fall or Halloween Card

2) Crafty Creations Challenges, Challenge #377 - Anything Goes
This is my 1st entry to this challenge.

3) Little Miss Muffet Challenges, Challenge #200 - Anything Goes

4) Simon Says Stamp Wednesday Challenges, Halloween/Spooky
This is my 1st entry to this challenge.


Thank you for stopping by and your kind feedback. Enjoy and smile! :o)


Milka

Thursday, August 23, 2018

Rainbow Numerals Birthday Card III (Jane's Doodles DT Spotlight)


Hi everyone! :o)

Yesterday was my turn to be on the spotlight over at Jane's Doodles and I made this CAS (clean and simple), Rainbow Numerals Birthday Card III. :o)


I made this card for my niece Tea, who's 8th birthday is today. ♥ Happy birthday sweet little girl!! ♥

I CASEd (copy and share everything) my own card I created earlier this year (find it here). I went with CASE because I really like the design of the original and because Tea likes rainbow colors and numbers (and Math). :o)

For my card I used stamps from two Jane's Doodles stamp sets: numerals from 'ABC's' stamp set and sentiment from 'Belated Birthday' stamp set.
: 


How I made this card...

I arranged numeral stamps on an acrylic ruler (I don't have long acrylic block) and inked them with VersaMark Watermark Ink. Then I inked each numeral with different Distress Ink, directly over the Watermark Ink, following a Rainbow pattern. I pressed inked numerals directly on a white cardstock paper panel. After drying, I glued the panel on a white side folded card base.

Next up was a sentiment. I heat embossed the sentiment in white on a black cardstock paper stripe, placed some foam on the back of the stripe and glued the sentiment on the card. 

As a finishing touch I embellished the card with enamel dots. :o)


Card measurements: 89 mm x 133 mm (3.5" x 5.25")

List of supplies :


I'm linking my card to following challenges:
Note: bold text and challenge badge (if any) are direct links to the current challenge and blog badge (if any) is a direct link to blog or challenge home page.

1) Craft Stamper Magazine, Take It, Make It Challenge, August 2018: Anything Goes
This is my 1st entry to this challenge.

2) Paru's Card Making Challenges, August 2018: Make a card or a tag for Family
This is my 4th entry to this challenge.
I made this card for my niece.


At the end of this post...

Jane has an End of Summer Sale and is offering 40% off on entire store. No code needed. The discount is calculated at the checkout. Find more details on Jane's Doodles blog. :o)

More inspiration (similar cards I made in the past):
Rainbow Numerals Birthday Card
Rainbow Numerals Birthday Card II


Thank you for stopping by and your kind feedback. Enjoy and smile! :o)


Milka
Related Posts Plugin for WordPress, Blogger...