Showing posts with label Stabilo Markers. Show all posts

Thursday, October 8, 2020

Whale of a Birthday Card no. 2 (Jane's Doodles DT September Spotlight)


Hi everyone! :o)

This is my second post today. If you missed the first one, just scroll down or follow a direct link here. :o)


Last weekend I planed to share my Jane's Doodles spotlight projects that I made in June, July, August and September, but I didn't share them here on my blog (full list of projects that I planed to share here). I managed to share all except my September's JD spotlight projects. My plan was to share them on Sunday, but I spent the day outside and didn't have strength to write after I came home.

Today I'm sharing my September spotlights and my JD spotlight project from last week, three spotlights in total, all in separate blog posts. My posts are scheduled and will go live every hour.


Second card today is this Whale of a Birthday Card. It was my spotlight project for Jane's Doodles on Tuesday, September 23rd, 2020.  :o)


To make this card I used stamps from a GORGEOUS Jane's Doodles 'Whales' stamp set. Jane's whales from the set are the most beautiful and realistic whale images available as stamps and that I'm familiar with . ♥


How I made my card...

First I made a panel from a watercolor paper. For coloring the background I went with ink smooshing technique. I used blue tone Stabilo markers, a plastic pocket bag, a sprayer bottle and water. I added some color on the plastic pocket bag, sprayed it with water and smooshed color on the panel. I was adding color by color, couple of layers, drying them between with a heat tool, until I was satisfied with color.

After coloring my panel wrapped quite a lot, so I flattened it with an iron. I placed the panel between two printing papers and ironed it. Flat. :o)

Then I stamped a sentiment on the panel and glued it on a white side folded card base.

Next up was an image. I used a gorgeous Blue Whale (lat. Balaenoptera musculus). Find more about Blue Whales on National Geographic pages (here).

I stamped the whale on the watercolor paper and colored it in watercolor technique using Stabilo markers. I used two colors: light and dark grey.

How? I scribbled a color on an acrylic block, picked up the color with a damp paint brush and colored the image. With a clean wet brush I spread the color and added more color where needed.

Coloring (and watercoloring) with Stabilo markers is a technique I've learned couple years ago from a very talented crafter/cardmaker, Julia Alterman. She filmed and shared few video tutorials on how to use inexpensive Stabilo markers (find them here). Thank you Julia!!! :o)

After drying, I fussy cut the whale and traced edges with a black marker. I stamped another whale on a piece of the white cardstock paper, colored it with the grey marker, fussy cut it, leaving white thin border around it, and glued the watercolored whale over it. I did this because the watercolor paper I use is thin and I needed a thicker image. :o)

To add some dimension on my card, I glued 3-D foam squares on the back of the whale and glued it on the card. As a finishing touch, I drew white highlights on the whale with a white pigment ink pen and my card was finished. :o)


Card measurements: 120 mm x 86 mm (4 3/4" x 3 3/8")

List of supplies:
  • Jane's Doodles 'Whales' stamp set
  • white cardstock paper
  • watercolor paper
  • Ranger Archival Ink (Jet Black)
  • Stabilo Fiber Tip Pens (Markers):
    • lightest blue 68/13
    • light blue 68/57
    • mid blue 68/41
    • dark blue 68/32
    • light grey 68/94
    • dark grey 68/96
    • black 68/46
  • UHU liquid glue
  • 3-D foam squares, 5 x 5 x 2 mm
  • acrylic block (102 mm x 102 mm)
  • round acrylic block
  • Fiskars High Precision Personal Paper Trimmer
  • bone folder
  • Ranger Heat It Craft Tool
  • Marabu fine rounded paint brush no. 3/0
  • scissors
  • water
  • paper towels
  • iron
  • printing paper


Thank you for stopping by and your kind feedback. Stop by at 6 PM, when my third card for today is scheduled. Enjoy and smile! :o)


Milka

Whale of a Day Mini Circle Card (Jane's Doodles DT September Spotlight)


Hi everyone! :o)

Last weekend I planed to share my Jane's Doodles spotlight projects that I made in June, July, August and September, but I didn't share them here on my blog (full list of projects that I planed to share here). I managed to share all except my September's JD spotlight projects. My plan was to share them on Sunday, but I spent the day outside and didn't have strength to write after I came home.

Today I'll be sharing my September spotlights and my JD spotlight project from last week, three spotlights in total, all in separate blog posts. My posts are scheduled and will go live every hour.


First up today is this Whale of a Day Mini Circle Card. It was my spotlight project for Jane's Doodles on Tuesday, September 15th, 2020.  :o)


To make this card I used stamps from a GORGEOUS Jane's Doodles 'Whales' stamp set. Jane's whales from the set are the most beautiful and realistic whale images that I'm familiar with available as stamps. ♥


How I made my card...

First I made a card base. I cut two circles from a white cardstock paper and glued them together on top.

For a panel, I cut a circle form a watercolor paper, slightly smaller than the card base. I stamped a sentiment on the panel, following a circular shape of the panel. Between sentiments I stamped the tiny heart.

Next up was coloring of the panel. I went with ink smooshing technique. I used blue tone Stabilo markers, a plastic pocket bag, a sprayer bottle and water. I added some color on the plastic pocket bag, sprayed it with water and smooshed color on the panel. I was adding color by color, couple of layers, drying them between with a heat tool, until I was satisfied with color.

My panel wrapped quite a lot, so I flattened it with an iron. I placed the panel between two printing papers and ironed it. Flat. :o)

I love dimension on my cards, so I added a bit of dimension to the panel. I used white cardstock paper scraps for it. I cut two circles from the scrap paper, slightly smaller than the panel, glued them together and glued the panel on them. Then I glued everything on the card base.

Next up was an image. I used a gorgeous Orca (also known as Killer Whale, lat. Orcinus orca). Find more about Orcas on National Geographic pages (here).

I stamped the Orca on the watercolor paper and colored it in watercolor technique using Stabilo markers. I used two colors: black and grey for shading a white part of Orca.

How? I scribbled a color on an acrylic block, picked up the color with a damp paint brush and colored the image. With a clean wet brush I spread the color and blended where needed.

Coloring (and watercoloring) with Stabilo markers is a technique I've learned couple years ago from a very talented crafter/cardmaker, Julia Alterman. She filmed and shared few video tutorials on how to use inexpensive Stabilo markers (find them here). Thank you Julia!!! :o)

After drying, I fussy cut the Orca and traced edges with the black marker. I stamped another Orca on a piece of the white cardstock paper, colored it with the grey marker, fussy cut it, leaving white thin border around it, and glued the watercolored Orca over it. I did this because the watercolor paper I use is thin and I needed a thicker image. :o)

Lastly, I glued 3-D foam squares on the back of the Orca, glued it on the card and my card was finished. :o)


Card measurements: d = 81 mm (3 3/16")

List of supplies:
  • Jane's Doodles 'Whales' stamp set
  • Jane's Doodles 'Monster Squad' stamp set
  • white cardstock paper
  • watercolor paper
  • Ranger Archival Ink (Jet Black)
  • Stabilo Fiber Tip Pens (Markers):
    • lightest blue 68/13
    • light blue 68/57
    • mid blue 68/41
    • dark blue 68/32
    • light grey 68/94
    • black 68/46
  • UHU liquid glue
  • 3-D foam squares, 5 x 5 x 2 mm
  • round acrylic block
  • Fiskars High Precision Personal Paper Trimmer
  • bone folder
  • EK Success Circle Cutter
  • Xcut self healing working mat
  • Ranger Heat It Craft Tool
  • Marabu fine rounded paint brush no. 3/0
  • scissors
  • water
  • paper towels
  • iron
  • printing paper


Thank you for stopping by and your kind feedback. Stop by at 5 PM, when my second card for today is scheduled. Enjoy and smile! :o)


Milka

Tuesday, September 29, 2020

Thanks a Latte Pumpkin Card (CASology Week #375)


Hi everyone! :o)

It's time for a new challenge over at CASology. This fortnight's cue word is Spice. :o)


We also have a sponsor for this challenge: Your Next Stamp. Find all details about the prize over at CASology blog.


And here is my take on the challenge: CAS (clean and simple), Thanks a Latte Pumpkin Card. :o)


Design defined: 
Adding dimension and some patterned paper gives a CAS card special interest.


How I made my card..

To make my card I used stamps from two Jane's Doodles stamp sets: an image from 'Pumpkin Spice' and a sentiment from 'Coffee Time'.

First I stamped a coffee cup on a watercolor paper and colored it with in watercolor technique using Stabilo Fibre Tip Pens (Markers), a Distress Ink Spiced Marmalade, a fine rounded paint brush and water. I drew dots with an orange Stabilo Fibre Tip Pen.

After drying, I fussy cut the coffee cup and traced edges with a black marker. I stamped another coffee cup on a white cardstock paper scrap, colored it with the black marker and fussy cut it, leaving a thin white border around it. Then I glued the watercolored coffee cup over it. I did this because the watercolor paper I use is very thin and I needed a thicker image.

With the finished image, I assembled my card. I glued a patterned paper stripe on a white top folded card base. I stamped the sentiment on a white cardstock paper panel and glued it on the card base. 

Lastly, I glued some 3-D foam squares on the image, glued it on the card and my card was finished. :o)


Card measurements: 83 mm x 127 mm (3 1/4" x 5")

List of supplies:
  • Jane's Doodles 'Pumpkin Spice' stamp set
  • Jane's Doodles 'Coffee Time' stamp set
  • white cardstock paper
  • patterned paper
  • watercolor paper
  • Ranger Archival Ink, Jet Black
  • Tim's Holtz Distress Ink, Spiced Marmalade
  • Stabilo Fibre Tip Pen (Markers):
    • Orange 68/54
    • Light Green 68/43
    • Dark Green 68/36
    • Light Brown 68/89
    • Dark Brown 68/45
    • Black 68/46
  • UHU universal glue
  • 3-D foam squares, 2 mm thick
  • Fiskars High Precision Personal Paper Trimmer
  • acrylic block (102 mm x 102 mm)
  • round acrylic block
  • bone folder
  • scissors
  • Marabu fine rounded paint brush no. 3/0
  • water
  • paper towels


I hope you'll like my card for this challenge and get inspired. For more inspiration, check out beautiful cards my Design Teammates and our Guest Designer created. Do join us in this challenge, we are looking forward to see your CAS creations. :o)


Milka Gubo (you are here)
Sue Symens
Galina (Guest Designer)


I'm linking my card to following challenges:
Note: bold text and challenge badge (if any) are direct links to the current challenge and blog badge (if any) is a direct link to blog or challenge home page.

1) Digi Choosday Crafting Challenge, Week 39 - Anything Goes
This is my 1st entry to this challenge.

2) Your Next Stamp, Challenge #148 - Fall Festival
This is my 1st entry to this challenge.


Thank you for stopping by and your kind feedback. Enjoy and smile! :o)


Milka

Sunday, June 21, 2020

Karate Green Belt Card (AAA Cards Game #168 GDT)


Hi everyone! :o)

I was delighted to be asked to be a Guest Designer at AAA Cards for a Game #168, after I won 1st place in their Game #164 One Image. I love playing AAA Cards challenges, as their challenges are all about CAS (clean and simple) cards, my favorite card design. :o)

The Game #168 theme is One Corner + optional twist Use Masking.


Card design needs to be CAS. Here is a CAS definition from AAA Cards blog:

Note: there are various CAS cards definitions on various blogs.


And here is my take on the challenge: CAS (clean and simple), one layer, Karate Green Belt Card. :o)


I made this card for my niece Tea (9), who trains Karate for six years. This Monday, June 15th, 2020, she had her fourth Karate exam to earn a Green Belt. She earned it!! :o)

Tea earned Green Karate Belt
Photo credit: GKV

Tea loved the card!! :o)

If you like, you can see cards I made for her when she earned previous Karate Belts (Yellow here, Orange here, Red here). :o)


How I made this card...

To make this card I used a super cute Mama Elephant 'Tiny Ninjas' stamp set. LOVE!!! :o)

I wanted to create movement on my card. Amazing technique shared by Christine Drogt of Create a Smile stamps was my inspiration (here).

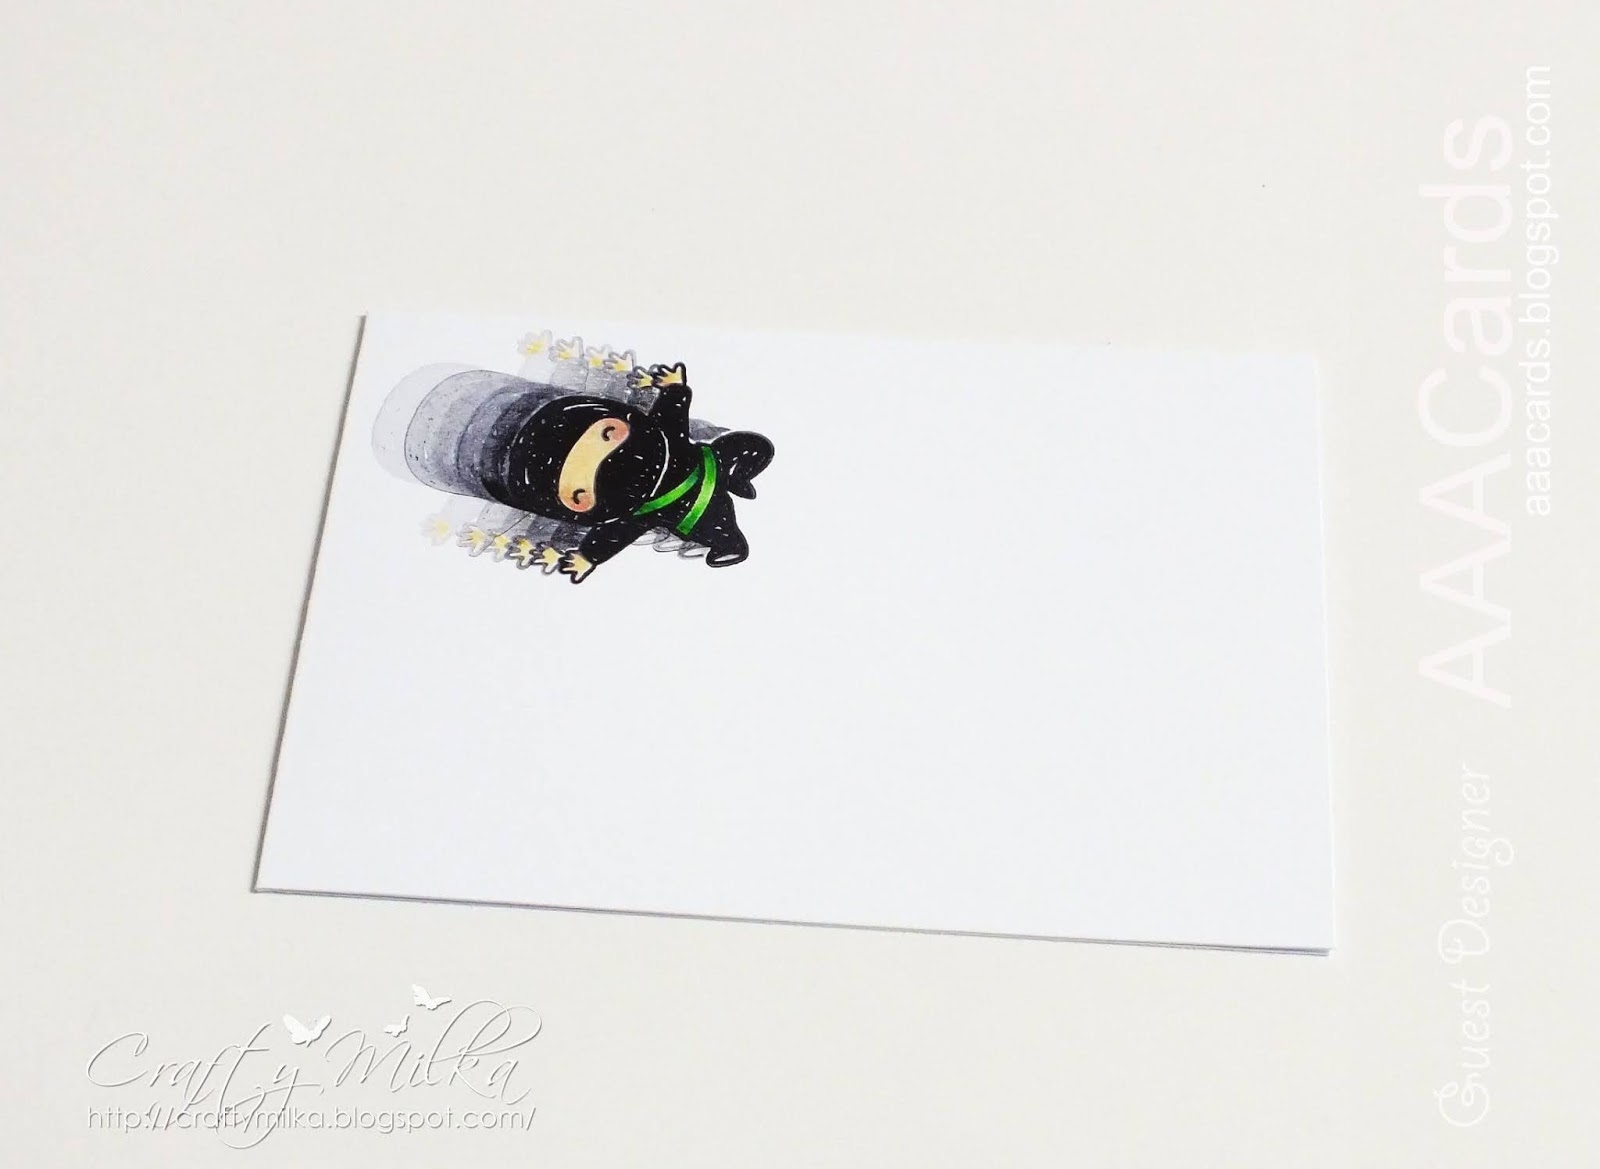
I stamped the adorable ninja directly on a white top folded card base. I made a mask from a post-it paper and glued it over the stamped ninja. Then I stamped same image 5 more times, without inking the stamp.

After the ink dried completely, I colored stamped images with colored pencils. I added extra shades with markers (fiber tip pens) and my card was finished. Super easy and fun!!! :o)


Card measurements: 89 mm x 127 mm (3 1/2" x 5")

List of supplies:
  • Mama Elephant 'Tiny Ninjas' stamp set
  • white cardstock paper
  • Ranger's Archival Ink (Jet Black)
  • TOZ Artist Color colored pencil, light green
  • TOZ Fantasy colored pencil, skin color
  • TOZ Hlapić colored pencil, pink
  • Stabilo colored pencil, dark grey
  • Caran D'Ache Prismalo Aquarelle colored pencils
    • dark pink
    • oker
    • light green
    • mid green
    • black
    • Stabilo Fiber Tip Pens (markers)
      • Pink 68/26
      • Light Green 68/43
      • Dark Green 68/36
    • round acrylic block (d = 70 mm)
    • Fiskars High Precision Personal Paper Trimmer
    • bone folder
    • scissors
    • post-it papers (for masking)


    This is my first try on this technique: create movement with stamps. I'm satisfied how my card turned out and will surely make more cards in the future using this technique. :o)

    I hope you'll like my take on the challenge and get inspired. :o) Stop by the AAA Cards and see amazing creations from the Design Team made for this challenge. The challenge ends on July 4th, 2020, so there is plenty time to share your CAS cards with us. :o) For more information about the challenge rules and prizes, jump over to challenge post at AAA Cards. :o)


    I'm linking my card to following challenges:
    Note: bold text and challenge badge (if any) are direct links to the current challenge and blog badge (if any) is a direct link to blog or challenge home page.

    1) Addicted to CAS, Challenge #187 - One Layer
    This is my 1st entry to this challenge.

    2) Penny Black and More, June Challenge - Favourite Stamps
    This is my 1st entry to this challenge.
    My favorite stamps are cute images, size: small. :o)

    3) STAMPlorations, CAS Card Challenge, June 2020, Anything CAS Goes
    This is my 3rd entry to this challenge.


    Thank you for stopping by and your kind feedback. Enjoy and smile! :o)


    Milka


    Sunday, February 16, 2020

    Get Well Soon Card (bastel-traum challenge #86)

    Hi everyone! :o)

    Yesterday, February 15th, 2020, a new challenge started at bastel-traum and our theme for the challenge #86 is Get Well. :o)


    The challenge started yesterday, February 15th, 2020, at 9 AM, CET or MET (UTC +1) and ends on March 15th, 2020, at 8:55 AM, CET or MET (UTC +1). Find all the details about the challenge, rules and prizes in a challenge post (here).


    And here is my take on the challenge: CAS (clean and simple), one layer, black and white with a pop of color, Get Well Soon Card. :o)


    How I made my card ....

    To make my card I used stamps from Jane's Doodles 'Cozy Up!' stamp set.

    I stamped an armchair and a sentiment directly on a white top folded card base.

    I wanted super simple card with a pop of color (rainbow in this case), so I colored only a blanket. I used Stabilo Fiber Tip Pens (markers) and a Wink of Stella Brush for coloring. I scribbled with markers on an acrylic block, picked up colors, one by one, with the Wink of Stella Brush and colored parts of the blanket in rainbow colors.

    As a finishing touch I drew white lines on the blanket between each color with a white pigment ink pen and my card was finished. :o)

    I love how my card turned out!! :o)


    Cards measurements: 89 mm x 121 mm (3 1/2" x 4 3/4")

    List of supplies:

    I hope you'll like my card for this challenge and get inspired. For more inspiration, check out cards my super talented Design Teammates created for the challenge. Do join us in this challenge, we are looking forward to see your creations. :o)


    I'm linking my card to a challenge:

    Craft Stamper Magazine, Take It Make It Challenge, February: Anything Goes
    This is my 1st entry to this challenge.


    Thank you for stopping by and your kind feedback. Enjoy and smile! :o)


    Milka
    Related Posts Plugin for WordPress, Blogger...