Friday, July 6, 2018

Aloha Card (Jane's Doodles DT Spotlight)


Happy Friday! :o)

Yesterday was my turn to be on the spotlight over at Jane's Doodles and I made this Aloha Card. :o)  I had some Internet connection issues and could not post this yesterday.


To make this card I used stamps from a GORGEOUS Jane's Doodles 'Hibiscus' stamp set.


How I made my card...

With some masking, I stamped gorgeous hibiscus flowers on a white watercolor paper. I made masks when I received the set and stored them for my future projects. So handy. :o)

I colored gaps among flowers with black marker. Then I watercolored hibiscus flowers in watercolor technique using Distress Inks. At the end I smeared one flower. Awful!!!

My first idea was to recreate a card I created for our latest blog hop (here), but with smearing that was impossible. I didn't want to throw away everything, so I tried something different. I fussy cut hibiscus flowers and cut away smeared portion. Using kraft knife, I cut out gaps between flowers (I previously colored them in black).

After fussy cutting, I traced edges with a black marker, glued some foam on the back of the hibiscus flower cluster and glued it on a white square card base, on which I previously stamped a sentiment. I glued a white cardstock panel inside the card to make it a bit sturdier.

As a finishing touch I drew white highlights and dots on flowers with a white pigment ink. :o)


Card dimensions: 95 mm x 95 mm (3 3/4" x 3 3/4")

List of supplies:
  • Jane's Doodles 'Hibiscus' stamp set
  • pre-made mask
  • white cardstock paper 
  • watercolor paper
  • Ranger Archival Ink (Jet Black)
  • Tim Hotlz's Distress Ink:
    • Mustard Seed
    • Festive Berries
  • Stabilo Fiber Tip Pen (Marker) 68/46, Black
  • Uniball Singo White Pigment Ink
  • UHU liquid glue
  • foam sheet scraps, 2 mm thick
  • Fiskars High Precision Personal Paper Trimmer
  • scissors
  • kraft knife
  • bone folder
  • acrylic block (102 mm x 102 mm)
  • Xcut A4 self healing mat
  • Marabu fine rounded paint brush no. #0
  • water
  • paper towels


I'm linking my card to following challenges:
Note: bold text and challenge badge (if any) are direct links to the current challenge and blog badge (if any) is a direct link to blog or challenge home page.

1) Card Mania Challenges, Challenge #106, Anything Goes
This is my 1st entry to this challenge.

2) Happy Little Stampers, Watercolour Challenge, July 2018, Anything Goes
This is my 1st entry to this challenge.


At the end of this post...

Jane has a sale and is offering 30% off on entire store. No code needed. The discount is calculated at the checkout. The sale is ending today, midnight CEST (UTC +2).


Thank you for stopping by and your kind feedback. Stop by later today, I will be sharing one more card. Enjoy and smile! :o)


Milka

Tuesday, July 3, 2018

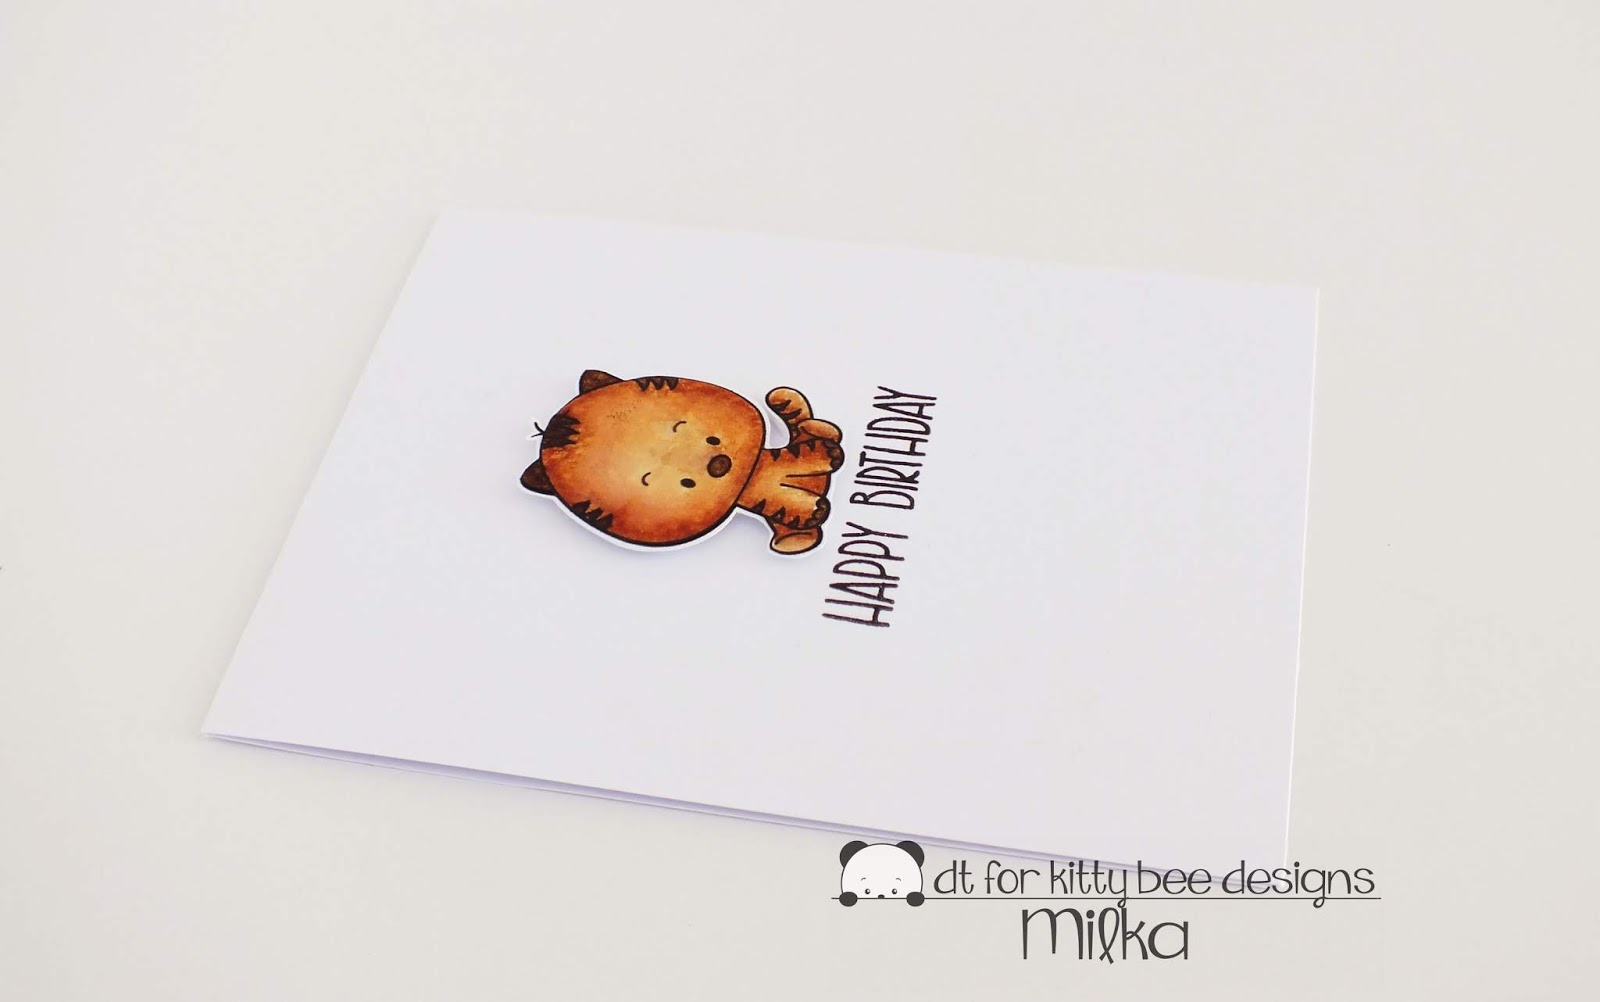
Birthday Tiger Card (Kitty Bee Designs Spotlight)

http://kittybeedesigns.blogspot.com/

Hi everyone! :o)

On Saturday, June 30th, was my turn to be on the spotlight over at Kitty Bee Designs and I made this CAS (clean and simple), Birthday Tiger Card. :o)


I made this card for my cousin's son Marko, who will celebrate his 3rd birthday this month. :o)

For my card I used a SUPER CUTE Kitty Bee Designs 'Ty the Tiger' digital image. This is my second card I made using this cutie. You can find the first one here. :o)


How I made my card....

I printed the tiger twice, one on a white cardstock paper and second on a watercolor paper. I left images dry through the night to prevent ink smearing while coloring.

I colored the tiger printed on cardstock paper with black marker and fussy cut the tiger leaving white thin border around him. Then I colored the tiger printed on watercolor paper in watercolor technique using Distress Inks. After drying, I fussy cut the tiger, traced edges with black marker, softened the image with a stylus ball and glued the tiger over the "black" tiger.

Lastly, I stamped a sentiment from Jane's Doodles 'Belated Birthday' stamp set on a white top folded card base, glued some foam on the back of the tiger, placed him on the card and my card was finished. :o)


Card dimensions: 95 mm x 127 mm (3 3/4" x 5")

List of supplies:

    I hope you'll like my today's KBD spotlight project and get inspired. For more inspiration and cute images jump over to the Kitty Bee Designs Etsy Store, Kitty Bee Designs Blog and Kitty Bee Designs FB. :o)


    I'm linking my card to following challenges:
    Note: bold text and challenge badge (if any) are direct links to the current challenge and blog badge (if any) is a direct link to blog or challenge home page.

    1) Seize the Birthday, Anything Goes
    This is my 2nd entry to this challenge.

    This is my 2nd entry to this challenge.

    3) The Daily Marker, 10th 30 Day Coloring Challenge
    This is my 3rd entry to this challenge.
    colored: DAY 30


    Thank you for stopping by and your kind feedback. Enjoy and smile! :o)


    Milka

    Thursday, June 28, 2018

    Happy BEERthday Card (Jane's Doodles DT Spotlight)


    Hi everyone! :o)

    Today is my turn to be on the spotlight over at Jane's Doodles and I made this CAS (clean and simple), masculine, Happy BEERthday Card. :o)


    To make this card I used stamps from two ADORABLE Jane's Doodles stamp sets: 'Cheers' and 'Belated Birthday'.


    How I made my card...

    I stamped a beer mug on a white cardstock paper and colored it with colored pencils. I added some extra shades with Stabilo fine liners. After coloring, I fussy cut the mug. Then I covered beer foam with a white pearl maker and left it dry for couple hours.

    Next up was a sentiment. I used words and letters from 'Belated Birthday' stamp set. I love word play and went with it on my card. :o) I stamped words 'Happy Birthday' directly on a white top folded card base. Then I heat embossed in white on a black cardstock paper word 'better'. I cut away letters TT and created word BEER. I glued some foam on the embossed letters and glued them on the card base partly covering word 'birthday'. Finally I got sentiment: Happy BEERthday. :o)

    I glued some foam squares on the beer mug and placed it on the card. As a finishing touch I embellished the card with white enamel dots. :o)


    Card dimensions: 95 mm x 127 mm (3 3/4" x 5")

    List of supplies:
    • Jane's Doodles 'Cheers' stamp set (image)
    • Jane's Doodles 'Belated Birthday' stamp set (sentiment)
    • white cardstock paper 
    • black cardstock paper
    • Ranger Archival Ink (Jet Black)
    • Tsukineko VersaMark Watermark Stamp Pad
    • WOW! Embossing Powder (Opaque Bright White, Regular, WL01R)
    • TOZ Artist Color colored pencils:
      • light yellow
      • dark yellow
      • orange
    • Stabilo colored pencil, grey 979/726
    • Staedtler Noris Club colored pencil, grey 144
    • Stabilo Fine Liners, fine 0.4:
      • yellow 88/44
      • orange 88/54
    • Stabilo Fiber Tip Pen (Marker) 68/46, Black
    • UHU liquid glue
    • foam tape, 1 mm thick
    • foam squares, 2 mm thick
    • pearl maker (pastel white)
    • Fiskars High Precision Personal Paper Trimmer
    • scissors
    • bone folder
    • acrylic block (102 mm x 102 mm)
    • Ranger Heat It Tool
    • powder bag
    • dry cloth


    I'm linking my card to following challenges:
    Note: bold text and challenge badge (if any) are direct links to the current challenge and blog badge (if any) is a direct link to blog or challenge home page.

    1) Little Miss Muffet Challenges, Challenge #192 - Anything Goes

    2) Seize the Birthday, Anything Goes
    This is my 1st entry to this challenge.

    3) Simon Says Stamp Monday Challenge, Food and/or Drink
    This is my 1st entry to this challenge.

    This is my 1st entry to this challenge.

    5) The Daily Marker, 10th 30 Day Coloring Challenge
    This is my 2nd entry to this challenge.
    colored: DAY 17


    Thank you for stopping by and your kind feedback. Enjoy and smile! :o)


    Milka
    Related Posts Plugin for WordPress, Blogger...