Showing posts with label Hedgehog. Show all posts

Sunday, November 29, 2020

Hey Pumpkin Mini Circle Card (Jane's Doodles DT October Spotlight)


Hi everyone! :o)

Today I want to share with you this Hey Pumpkin Mini Circle CardIt was my spotlight project for Jane's Doodles on Tuesday, October 13th, 2020. I didn't manage to share it here on my blog earlier, so I'm sharing it today. :o)


To make this card I was inspired with a card I made for our last Jane's Doodles Release Blog Hop (here).

For my card I used stamps from a GORGEOUS 'Pumpkin Patch' stamp set. ♥


How I made my card....

First I created a background panel. I stamped randomly pumpkins and a sign on a Kraft paper in watermark stamping technique using VersaMark Watermark Ink. Then I die cut a wonky stitched circle from the paper and stamped a sentiment in black on it.

Then I made a card base. I cut two circles from a white cardstock paper and glued them together on the top.

Next up were images. I stamped an adorable hedgehog, pumpkins and the sign on a watercolor paper and colored them in watercolor technique with Distress Inks. After drying, I fussy cut images and traced their edges with a black marker.

Then I stamped same images again on the Kraft panel, creating a scene. I colored images with a grey marker and glued watercolored images over the grey ones. It's paper pieced scene. :o)

I glued the panel on the circle card base.

As a finishing touch I drew white highlights on images using a white gel pen and my card was finished. :o)


Card measurements: d = 83 mm (3 1/4")

List of supplies:
  • Jane's Doodles 'Pumpkin Patch' stamp set
  • white cardstock paper
  • watercolor paper
  • Crafter's Companion Neenah Desert Storm Kraft Coloring Card
  • Tsukineko VersaMark Watermark Stamp Pad
  • Ranger's Archival Ink (Jet Black)
  • Tim Holtz Distress Inks:
    • Spiced Marmalade
    • Carved Pumpkin
    • Twisted Citron
    • Lucky Clover
    • Ground Espresso
  • Stabilo Fibre Tip Pen (Marker), Black 68/46
  • Stabilo Fibre Tip Pen (Marker), Light Grey 68/94
  • Uniball Signo White pigment ink pen
  • UHU liquid glue
  • Fiskars High Precision Personal Paper Trimmer
  • bone folder
  • Sizzix Big Shot
  • My Favorite Things, Die-namics Wonky Stitched Circle STAX
  • EK Success circle cutter
  • Xcut SelfHealing Cutting Mat A4
  • round acrylic block
  • Marabu fine rounded paint brush no. 3/0
  • scissors
  • paper towels
  • water


Thank you for stopping by and your kind feedback. Enjoy and smile! :o)


Milka

Tuesday, March 22, 2016

Two Sweet Little Thing Cards (Celebrating 30 Days of Pisces 2016, #22, #23)

Hi everyone! :o)

If you visited my blog this Sunday, I announced my Celebrating 30 Days of Pisces 2016 personal challenge was accomplished and finished on time. I'm so happy and very satisfied with the challenge and cards I made. :o)

For now I shared 21 cards here with you and have 9 more to share and to write a wrap up post. I hope I'll manage to do all this week. :o)


If you like, visit my Celebrating 30 Days of Pisces 2016 page, where you can find more about my challenge, photo gallery and links to each card. :o)


And now my cards...


First up today are these Two Sweet Little Thing Cards.


CAS, one layer cards, easy and quick to create.

First I made frames on my cards. I traced lines on scoring board.

Then I stamped images and sentiment from Clearly Besotted 'Mini Woodland Pals' stamp set on a Kraft paper card base and colored both images with colored pencils.


After coloring I covered their muzzles with gloss resin gel to create glossy accents and to add a bit of dimension to my cards and my cards were finished. :o)


Both cards measures 91 mm x 124 mm (3 5/8" x 4 7/8").

List of supplies:

  • Clearly Besotted 'Mini Woodland Pals' Stamp Set (I think the set is retired.)
  • Crafter's Companion Neenah Desert Storm Kraft Coloring Card
  • Ranger's Archival Ink (Jet Black)
  • Koh-i-noor Woodless Colored Pencils (White 3, Reddish Orange 2)
  • Koh-i-noor White Universal pencil for writing on gloss surfaces
  • TOZ light and dark brown colored pencils
  • Gloss Resin Gel Super Clear
  • MS scoring board
  • trimmer
  • acrylic block (102 mm x 102 mm)
  • crafting needle


I am entering my cards to following challenges:
Note: bold text is a direct link to the current challenge and blog badge is direct link to blog or challenge home page.

1) Craft Your Passion Challenges, Challenge #304 - Always Anything Goes
This is my 1st entry to this challenge.

2) Lil Patch of Crafty Friends Challenge Blog, Challenge #30 - Anything Goes
This is my 1st entry to this challenge.

3) Simon Says Stamp, Wednesday Challenge Blog, Challenge: Cute and Cuddly
This is my 3rd entry to this challenge.


Thank you for stopping by and your kind feedback. Stay around, I'll be sharing one more card in couple of minutes. Enjoy and smile! :o)


Crafty Milka

Sunday, March 20, 2016

Hedgehog Card (Celebrating 30 Days of Pisces 2016, #21)

Hi everyone! :o)

My third post today... If you missed first two, just scroll down or follow direct links here and here.

Today I'm sharing CAS (clean and simple) cards I made for a Celebrating 30 Days of Pisces 2016 personal challenge. If you want to find out more about my challenge, visit my Celebrating 30 Days of Pisces 2016 page.

21st card I made for the challenge is this Hedgehog Card.

I stamped super cute hedgehog from a Clearly Besotted 'Mini Woodland Pals' stamp set on a white watercolor paper, colored him with Distress Inks in watercolor technique, fussy cut him and colored edges with black marker. 


Watercolor paper I use is very thin and it's not so good when popping-out the image, but it has great white color and it's not expensive. To make the image thicker and prevent bending when mailing, I stamped one more hedgehog on a white cardstock paper scrap,  fussy cut him out, colored edges with black marker and glued together both images (colored and non colored hedgehog).

I glued stitched hills and clouds die-cuts on a card base. I got these from friend Kristina. :o)


I added 3D foams on the back of the hedgehog, placed him on the card and my card was finished.


I tried how would it look like with a sentiment, but I didn't like it, so I left this card without sentiment.


Card measurements are 92 mm x 126 mm (3 5/8" x 5").

List of supplies:

  • Clearly Besotted 'Mini Woodland Pals' Stamp Set (I think the set is retired.)
  • white cardstock paper
  • white watercolor paper
  • Ranger's Archival Ink (Jet Black)
  • Stabilo Pen (Marker), Black 68/46
  • Tim Holtz's Distress Inks
    • Tea Dye
    • Vinatge Photo 
    • Brushed Corduroy
  • Sakura Quickie Glue Pinpoint Roller
  • double sided strong adhesive tape
  • MS scoring board
  • trimmer
  • scissors
  • acrylic block (102 mm x 102 mm)
  • Marabu rounded fine paint brush no. #0
  • water
  • paper towels
  • clouds and stitched hills die cuts (I got these from my friend Kristina.)


I am entering my card to following challenge:
Note: bold text is a direct link to the current challenge and blog badge is direct link to blog or challenge home page.

Simon Says Stamp, Wednesday Challenge Blog, Challenge: Cute and Cuddly
This is my 2nd entry to this challenge.


This would be all for today. I'm very tired and don't have strength to write anymore. I'll continue sharing the rest of CAS cards, nine more, tomorrow. :o)


Thank you for stopping by and your kind feedback. Enjoy and smile! :o)


Crafty Milka

Thursday, June 25, 2015

Hedgehog Card (Hanna and Friends #225)

Hi everyone :-D

Today I am posting my sixth and last project as a Guest Designer at Hanna and Friends.
http://just-hanna-stamps.blogspot.com/

These past three months were really a great fun. I am very happy I had an opportunity to work with very talented and nice ladies. And, oh WOW, we really had great themes! You can see all my Hanna and Friends GDT projects here. :-D

There is currently a new Guest Designer Call at Hanna and Friends . Everyone is invited to apply. Here is a direct link.

Now to the current challenge. Theme for this fortnight is #225 - Inchies. Use at least one inchie on your project.

A prize for one lucky winner are 5 digital stamps of winner's choice, sponsored by My Besties.


For this challenge, I made this Hedgehog Card.


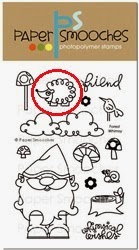
I used scraps of white cardstock paper and cut 4 inchies (squares 1" x 1"). Then I stamped cute hedgehog from  Paper Smooches 'Forest Whimsy' stamp set in each inchie. I colored images in watercoloring technique using Tim Holtz´s Distressed Inks, paint brush and water. 

After drying, I distressed edges of inchies and glued them to a larger squares. I made these from scraps of textured cardstock paper. 

I glued 3-D foam pads on each square, to pop up inchies, and added clear resin on hedgehog's muzzle and eyelid (on each image) to create glossy accents.

I used Kraft paper bag for layers. 

Sentiment is from the same stamp set as image,  Paper Smooches 'Forest Whimsy'.

At the end I decided to add gloss resin dots on Kraft paper layer, to add more interest to the whole card. 

Card dimensions are 139 mm x 101 mm (5 1/2" x 4").

List of supplies:
  • Paper Smooches 'Forest Whimsy'
  • white cardstock paper 
  • Kraft paper bag (100% recycled) 
  • Florence cardstock paper, Canvas Texture (brown) 
  • Tim Holtz´s Distressed Inks (Tea Dye, Vintage Photo, Brushed Corduroy)
  • Ranger Archival Ink (Jet Black)
  • UHU universal glue  
  • gloss resin super-clear 
  • 3-D foam self adhesive pads
  • polymer stamp handle (38 mm x 35 mm)
  • scoring board
  • trimmer
  • scissors 
  • Marabu fine paint brush no. 1
  • Tim Holtz's blending tool 
  • crafting needle 
  • water


I hope you'll like my card. :-D  Need more inspiration... Stop by the Hanna and Friends and check out lovely projects Design Team and other Guest Designers created for this challenge. Do join us in this challenge, we are looking forward to see your projects. :-D


I am entering my card to following challenges:
Note: bold text and challenge badge (if any) are direct links to the current challenge and blog badge (if any) is direct link to blog or challenge home page. 


1) Fairytale Stampers, Challenge #57 - Anything Goes
http://fairytalestamper.blogspot.com/

2) Paper Smooches SPARKS, June Anything Goes (wk3) challenge
http://papersmoochessparks.blogspot.com/

3) Simon Says Stamp Wednesday Challenge, Anything Goes
http://www.simonsaysstampblog.com/wednesdaychallenge/

4) The Daily Marker, 2nd 30 Day Coloring Challenge
This is my 1st entry to this challenge. 


Thank you for stopping by and your kind feedback. Enjoy and smile! :-D


Crafty Milka

Friday, May 29, 2015

Altered Kraft Paper Bag (KBD Aloha Friday Challenge #48 Mid Inspiration)

Happy Friday everyone :-D 

Today I'm posting my mid-inspiration project for ongoing Aloha Friday Challenge at Kitty Bee Designs.
http://kittybeedesigns.blogspot.com/

The challenge for this fortnight is #48 - Sew Cute (real/faux stitching).

Our sponsor for this challenge is Dilly Beans Digi Stamps, with an awesome prize for our random winner: 3 digital images of winner's choice.
http://www.sillydillybeans.blogspot.com/


I made an Altered Kraft Paper Bag, using our sponsor's lovely image 'Crinkles Hearts Framed'. I used real stitches on my project. 


I printed the image on a white cardstock paper and colored it in watercoloring technique, using Distressed Inks and aquarell colored pencil, water and brush. When it was dry, I fussy cut the image and colored edges with black pen.

I printed one more image on Kraft packing paper and glued colored image over it.


I glued a fabric on the paper bag and sewn upper corner with red sewing thread.

Then I glued piece of corrugated cardboard and the image on the bag and sewn two wooden flowers on it. Finished! :-D

List of supplies: 
    http://sillydillybeans.blogspot.com/2012/02/364-crinkles-hearts-framed-3.html
  • Dilly Beans Digi Stamps 'Crinkles Hearts Framed'
  • white cardstock paper 
  • Kraft paper bag 
  • Kraft packing paper 
  • corrugated cardboard 
  • red sewing thread 
  • thread 
  • fabric 
  • wooden flowers 
  • Tim Holtz's Distressed Inks (Mustard Seed, Brushed Corduroy, Walnut Stain, Black Soot) 
  • Koh-i-noor Mondeluz aquarell colored pencil (red 7) 
  • Staedtler Lumocolor permanent black pen M (medium) 1.0 mm  
  • UHU universal glue 
  • double sided strong adhesive tape 
  • printer
  • scoring board 
  • trimmer
  • scissors 
  • hand sewing needle 
  • Marabu fine paint brush no. 1
  • Marabu fine paint brush no. 10
  • water

Stop by the Kitty Bee Designs blog and check out lovely projects my Design Team mates created. And don´t forget to join us in this challenge. We are looking forward to see your projects. :-D


I am entering my card to following challenges:
Note: bold text is direct link to the current challenge and blog badge is direct link to blog or challenge home page.

1) Addicted to Stamps and More, Challenge #146 - Anything Goes
This is my 3rd entry to this challenge. 

2) Craft My Life, All Crafts Challenge April/May 
This is my 3rd entry to this challenge. 
http://sparklingblackrose-craftmylife.blogspot.com/

3) Simon Says Stamp Wednesday Challenge, Anything Goes
This is my 2nd entry to this challenge. 
http://www.simonsaysstampblog.com/wednesdaychallenge/

4) The Pink Elephant Challenge, TPE300 - Anything Goes 
http://thepinkelephantchallenge.blogspot.com/


Thank you for stopping by and your kind feedback. Enjoy and smile! :-D


Crafty Milka

Thursday, March 12, 2015

Smile Mini Card

Hi everyone :-D

Today I have another CAS (clean and simple), mini card to share with you. It´s a Smile Mini Card.


This was quick and easy to make card.

I cut out card base from a white cardstock paper and rounded two opposite corners with round corner paper puncher. Card dimensions are 76 mm x 101 mm (3" x 4"). 

Then I printed a sentiment on the card base that I wrote on my computer, using beautiful 'A Little Pot' free font from Kevin & Amanda Free Scrapbook Fonts.
http://www.kevinandamanda.com/fonts/freescrapbookfonts/

I stamped cute hedgehog from  Paper Smooches 'Forest Whimsy' stamp set on a piece of white cardstock paper and colored him in watercoloring technique using Tim Holtz´s Distressed Inks, paint brush and water.
While I was coloring I blended two inks together: 
  • face and legs: Tea Dye and Brushed Corduroy 
  • body: Vintage Photo and Brushed Corduroy

After ink was dry, I fussy cut the hedgehog, colored borders with black permanent marker and added a bit of glossy transparent varnish on his muzzle, eye and eyelid.

To add just a little more interest to this CAS card, I decided to pop up the hedgehog.   
I don´t have any dimensional foam in my stash. While I´m waiting dimensional foam I ordered to arrive, I am using what I have in my stash.  
This time I used small pieces of felt I have. I glued them with universal glue behind the hedgehog and then to the card base. Image is dimensioned, just like I wanted. :-D 


List of supplies:
    http://www.papersmoochesstamps.com/Forest_Whimsy_p/nosc-11-050.htmhttp://www.kevinandamanda.com/fonts/freescrapbookfonts/
  • Paper Smooches 'Forest Whimsy'
  • 'A Little Pot' free font from Kevin&Amanda
  • white cardstock paper 
  • Tim Holtz´s Distressed Inks (Tea Dye, Vintage Photo, Brushed Corduroy)
  • Ranger Archival Ink (Jet Black)
  • Staedtler Lumocolor permanent black pen F (fine) 0.6 mm
  • Staedtler Lumocolor permanent black pen M (medium) 1.0 mm
  • Pritt universal glue  
  • transparent varnish with extra gloss 
  • polymer stamp handle (38 mm x 35 mm) 
  • printer
  • scoring board
  • trimmer 
  • Marabu fine paint brush no. 1
  • crafting needle 
  • Nivea baby cleaning wipes
  • water  
  • felt pieces  


I am entering my card to following challenges:
Note: bold text and challenge badge (if any) are direct links to the current challenge and blog badge (if any) is direct link to blog or challenge home page. 

1) Addicted to CAS, Challenge #58 - Distress
http://addictedtocas.blogspot.com/

2) Simon Says Stamp Monday Challenge, B is for... 
Brown
This is my 2nd entry to this challenge.
http://www.simonsaysstampblog.com/mondaychallenge/

3) The Daily Marker, 30 Day Coloring Challenge
This is my 3rd entry to this challenge. 
http://www.thedailymarker.com/2015/03/day-one-30-day-coloring-challenge-giveaway/

4) Through The Craft Room Door, TTCRD Challenge from March 10th to March 16th, Anything Goes


Thank you for stopping by and your kind feedback. Enjoy and smile! :-D 


Crafty Milka
Related Posts Plugin for WordPress, Blogger...