Hi everyone! :o)
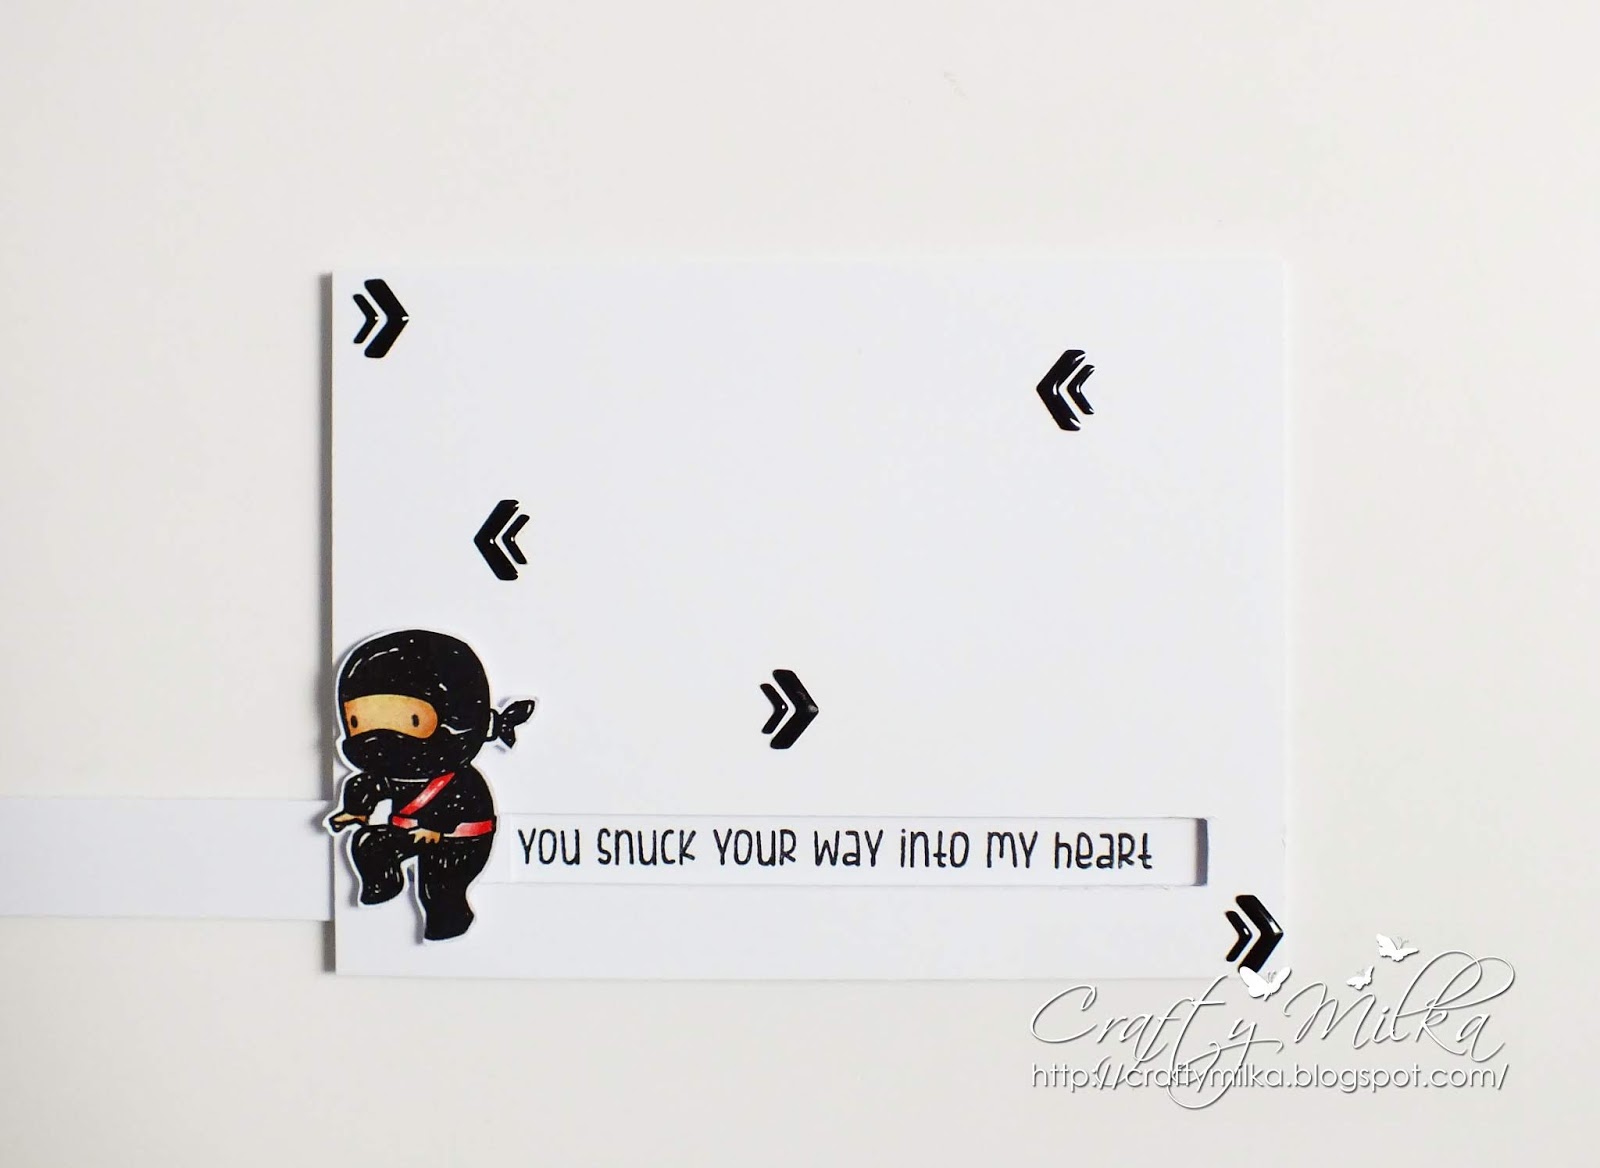
Today I want to share with you this CAS (clean and simple), Ninja Pull-Tab Slider Card. :o)


This is a PULL-TAB SLIDER CARD. I made this Interactive Card (IC) for my Celebrating 30 Days of Pisces 2019 personal challenge. If you want to find out more about it, just follow the link provided. :o)
This is an eighth type of IC I made for my challenge. I made 15 different types of interactive cards during Pisces period, which was my personal challenge. I completed my challenge, achieved my goals and had a lot of fun. I wrote a short review about the challenge here.
How I made this card...
To make this card I used a super cute Mama Elephant 'Tiny Ninjas' stamp set. LOVE!!! :o)
I colored a Ninja during Kathy's Racoosin 12th 30 Day Coloring Challenge. You can see all my coloring samples during the challenge here.
I stamped the adorable ninja on a watercolor paper and watercolored him using Distress Inks. After drying, I fussy cut the ninja and traced edges with black marker.
I stamped one more ninja on a white cardstock paper, colored ninja with black marker and fussy cut him, this time leaving white thin border around him.
I glued both images together, the watercolored ninja over the black one. I did this because the watercolor paper I use is very thin and I needed thicker image for my card.
I drew white highlights on ninja's belt and the image was finished.
I prepared a side folded card base and a white cardstock paper panel, both same size.
I cut two long parallel lines on the panel using ruler and kraft knife. Then I cut two smaller parallel lines and removed a cut out rectangle shape from the panel.
Then I made a pull-tab. I cut a stripe from the white cardstock paper, rounded edges with scissors and glued a plastic button on the end of the tab.
I cut one more stripe from the white cardstock paper and stamped a sentiment on it.
With all parts ready, I assembled the card. I glued the sentiment stripe on the card base, glued 3-D foams on the panel, placed the sentiment stripe on the card base and carefully glued the panel on the card base, making sure the button was peeking through the cut out on the panel. Prior I continued, I tested the pull-tab. Then I glued the ninja on the button and left it dry for an hour.
As a finishing touch, I embellished the card with black enamel stickers. :o)

Card measurements: 95 mm x 127 mm (3 3/4" x 5")
List of supplies:
- Mama Elephant 'Tiny Ninjas' stamp set
- white cardstock paper
- watercolor paper
- Ranger's Archival Ink (Jet Black)
- Tim Holtz's Distress Inks:
- Tea Dye
- Barn Door
- Stabilo Fiber Tip Pen (Marker) 68/46, Black
- white plastic button
- Create a Smile 'Neat & Neutral' enamel sticker
- UHU liquid glue
- 3-D foam 5 x 5 x 2 mm
- acrylic block (102 mm x 102 mm)
- Fiskars High Precision Personal Paper Trimmer
- Xcut Self Healing Cutting Mat A4
- bone folder
- scissors
- kraft knife
- crafting needle
- ruler
- Marabu rounded fine paint brush no. #0
- water
- paper towels

I love how my card turned out, as this was my first take on this interactive card type. My sweetheart loves it too. I made the card for him. :o)
Here is a short video... I'm filming with one hand and moving pull-tab with other. LOL That was fun. :o)
Here is a short video... I'm filming with one hand and moving pull-tab with other. LOL That was fun. :o)
(incompetech.com)
Licensed under Creative Commons: By Attribution 3.0
http://creativecommons.org/licenses/by/3.0/
Licensed under Creative Commons: By Attribution 3.0
http://creativecommons.org/licenses/by/3.0/
Thank you for stopping by and your kind feedback. Enjoy and smile! :o)
Milka

pre super je!
ReplyDeleteHow fun, Milka!! Wow wow wow!! :D This interactive ninja makes me smile!! So creative! The arrows look great, fabulous design!
ReplyDelete